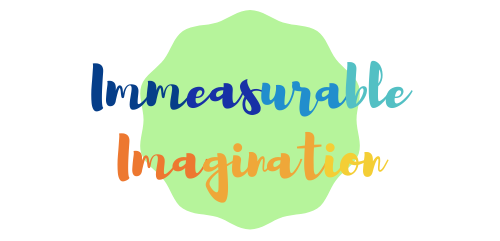
I am a big fan of dressing up for Halloween alongside the kids. Family costumes haven’t always been a thing around here, but I sure enjoy when we figure out a way to dress up together. With a little creativity and some awesome scores from the thrift store, I was able to put together these DIY Loki and Thor costumes.
DIY Loki and Thor Thrifting
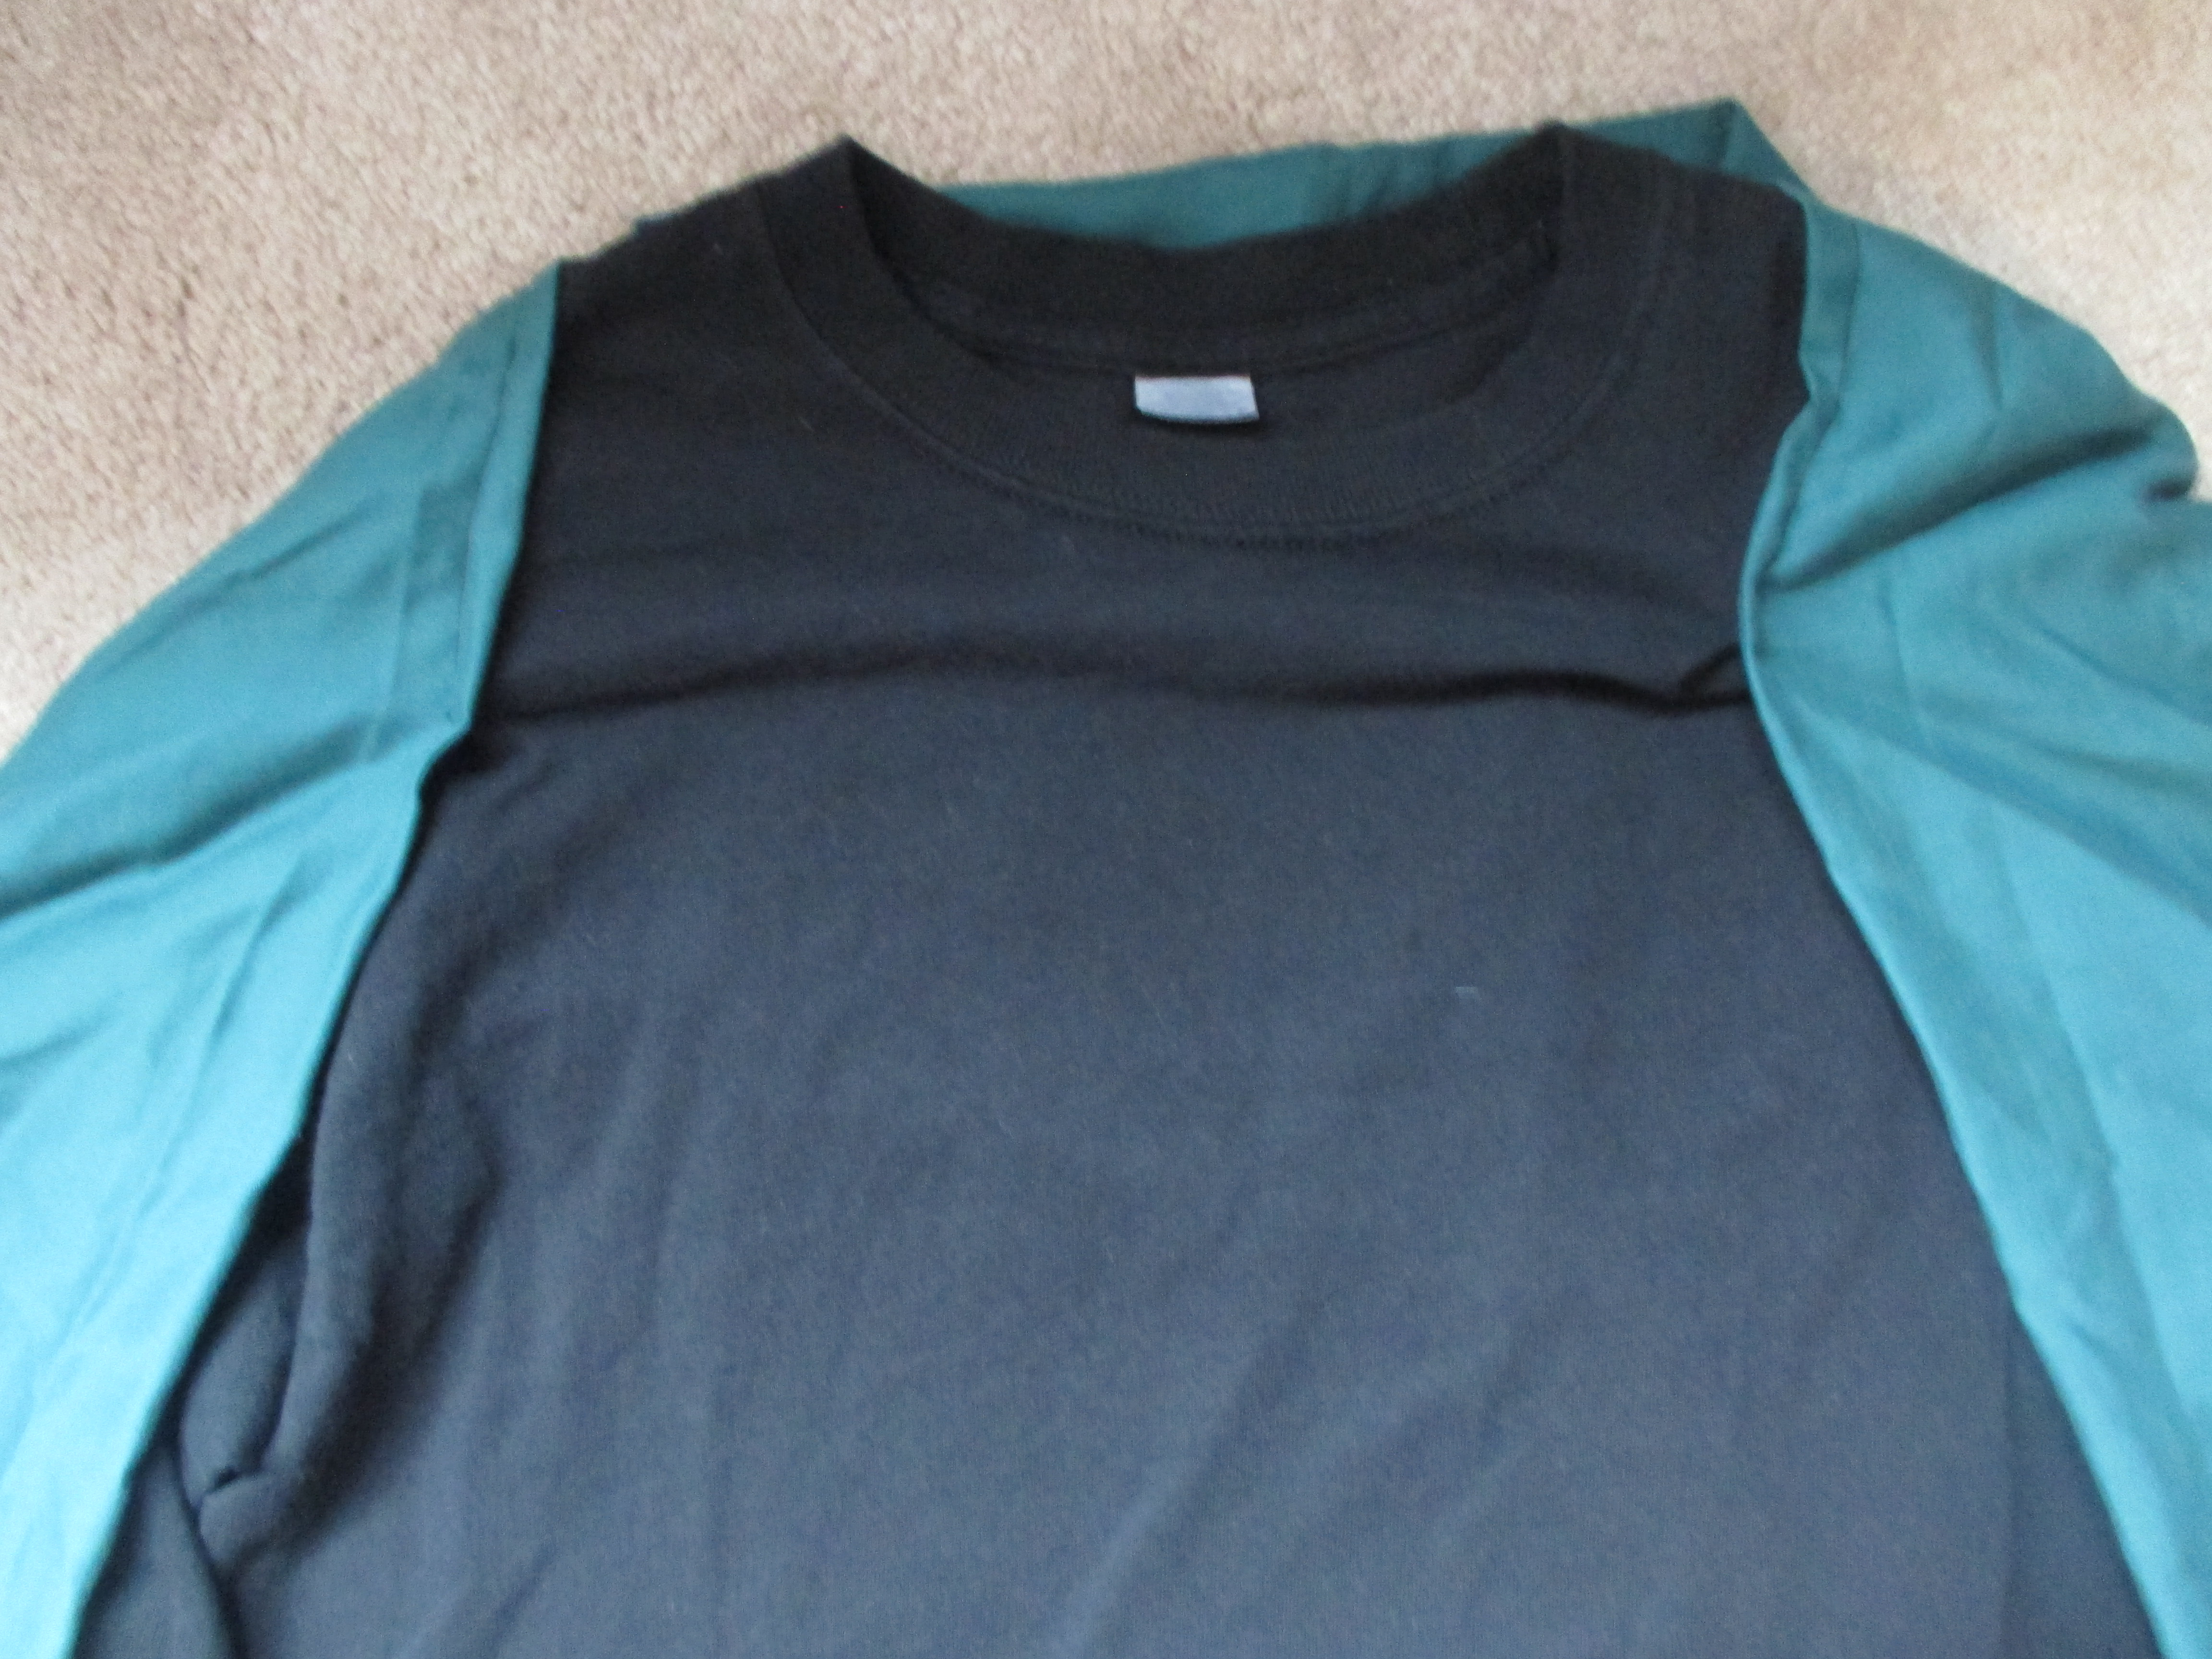
The make or break for me on these costumes was the thrift store. We are not picky about being exact on the colours and styles. Since we’re not attending any cosplay events and simply having fun, it’s important to focus on the most recognizable characteristics of the characters. For Thor, it is the hair and the hammer. For Loki, the horns, black hair, and some kind of cape are the focus. At the thrift store we were able to find a sweatshirt, pajama pants, a red housecoat, a black long-sleeve shirt, and a green bed sheet. With that, most of the costumes were already done.
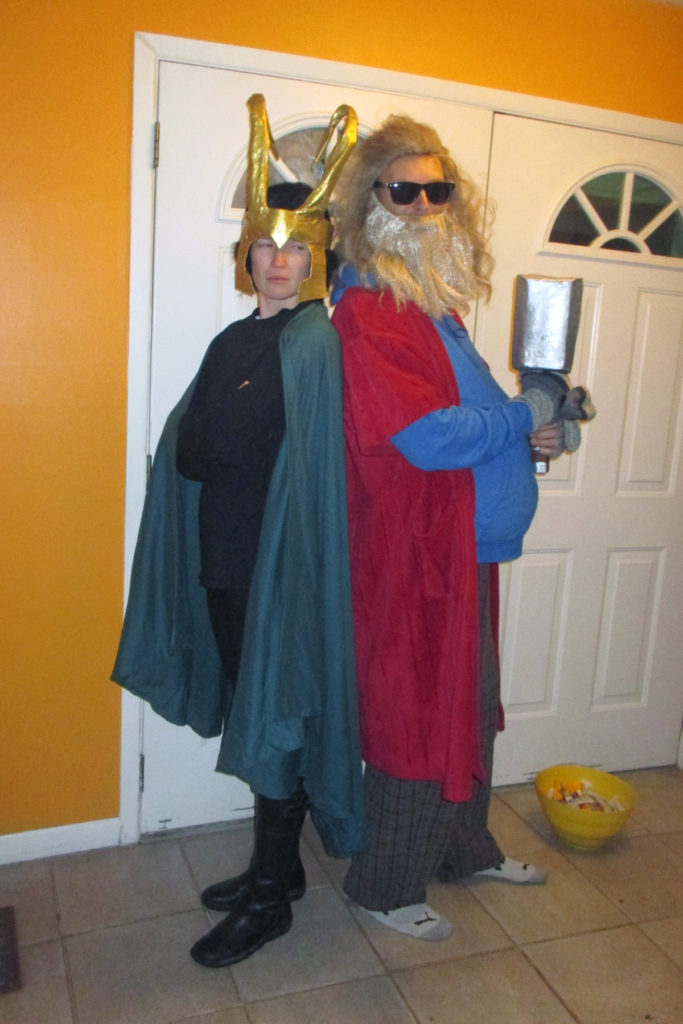
Putting Together Thor
Admittedly, I lucked out with the hair and beard on this costume. My husband’s friend happened to have those, as well as a pad for the belly. If you don’t have a rounded pad, it is easy to put a small pillow instead. I highly recommend wearing a shirt over the pillow that can be tucked in so it doesn’t slide out the bottom of the sweatshirt.
Our housecoat had long sleeves (as most do), so I simply cut the sleeves off. If you want to use the housecoat for something other than this costume, it’s easy enough to roll up the sleeves.
Lastly, make sure you grab a pair of sunglasses. It really puts the costume over the top!
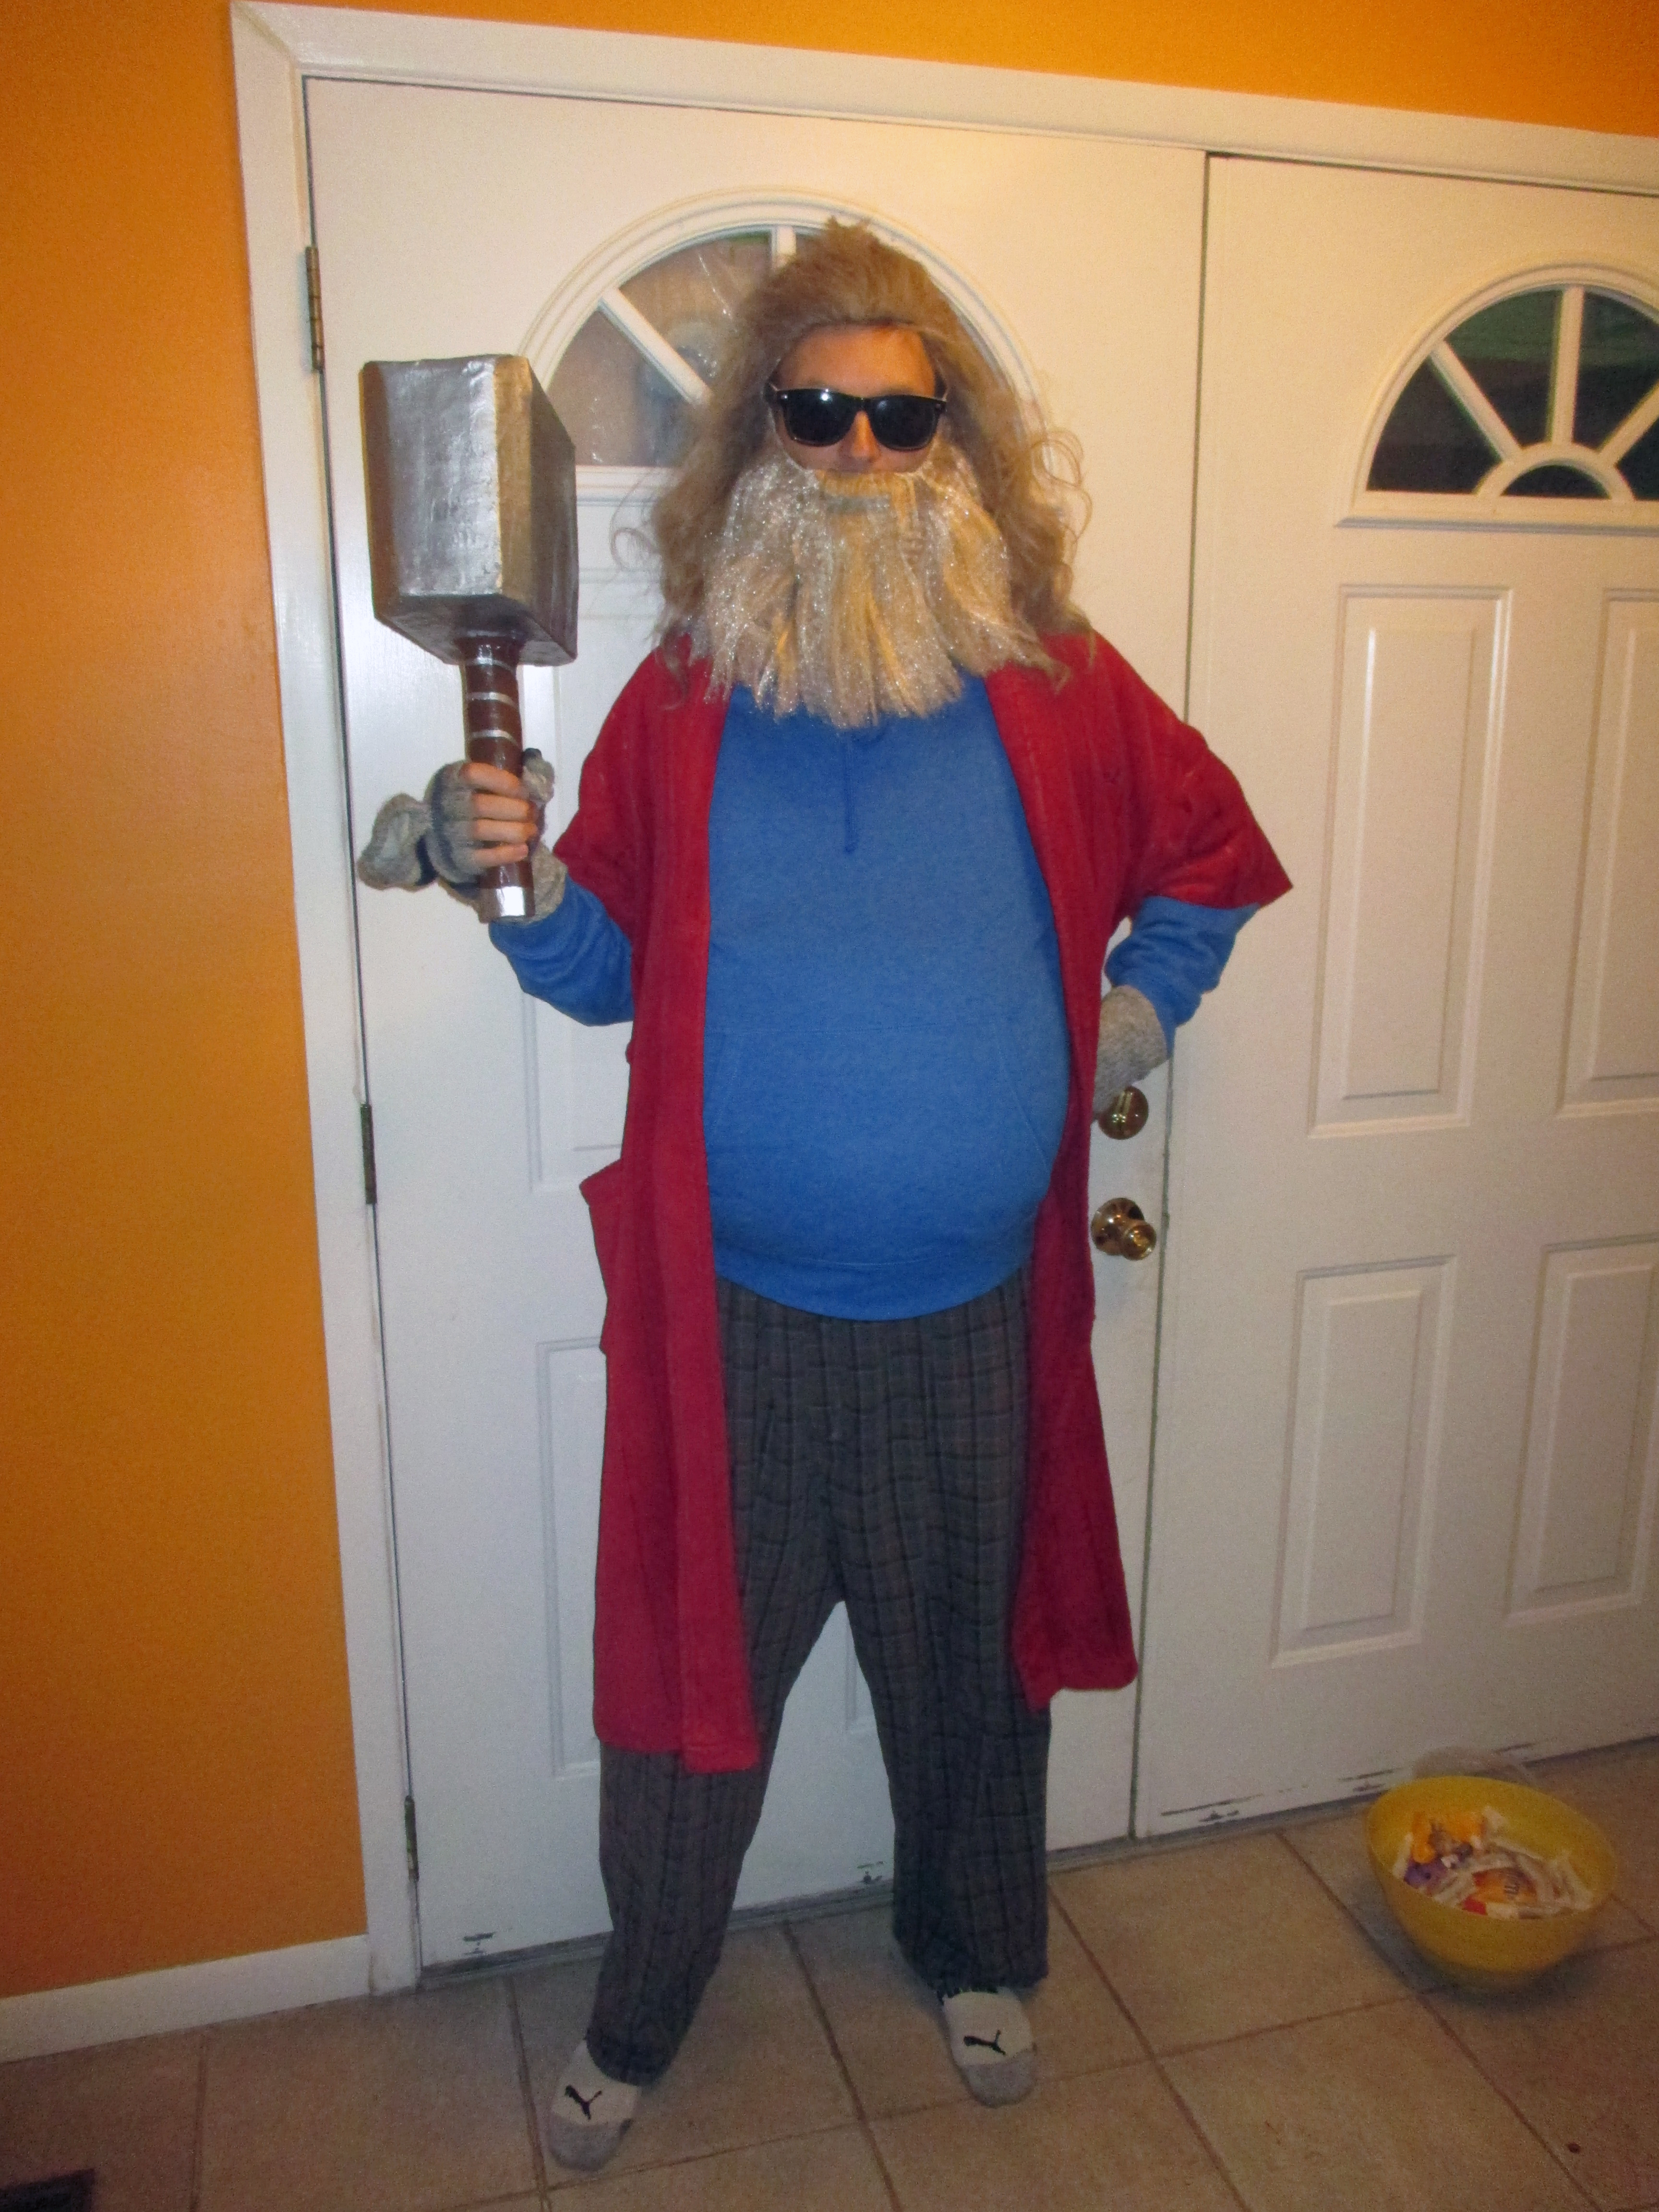
Mjolnir
Making the base of the hammer is probably the most time consuming part of creating Mjolnir. Once you have a frame for it, the rest is easy.
Step One: Build the base of the hammer head. Use cereal boxes or other thin cardboard, and secure with tape. Cut a hole in one of the sides so you can attach the handle.
Step Two: Stuff the hammer head with newspaper or plastic bags in order to keep the shape once you apply the papier-mâché.
Step Three: Using a paper towel tube or rolled up cardboard, insert the handle into the pre-cut hole. Secure with tape.
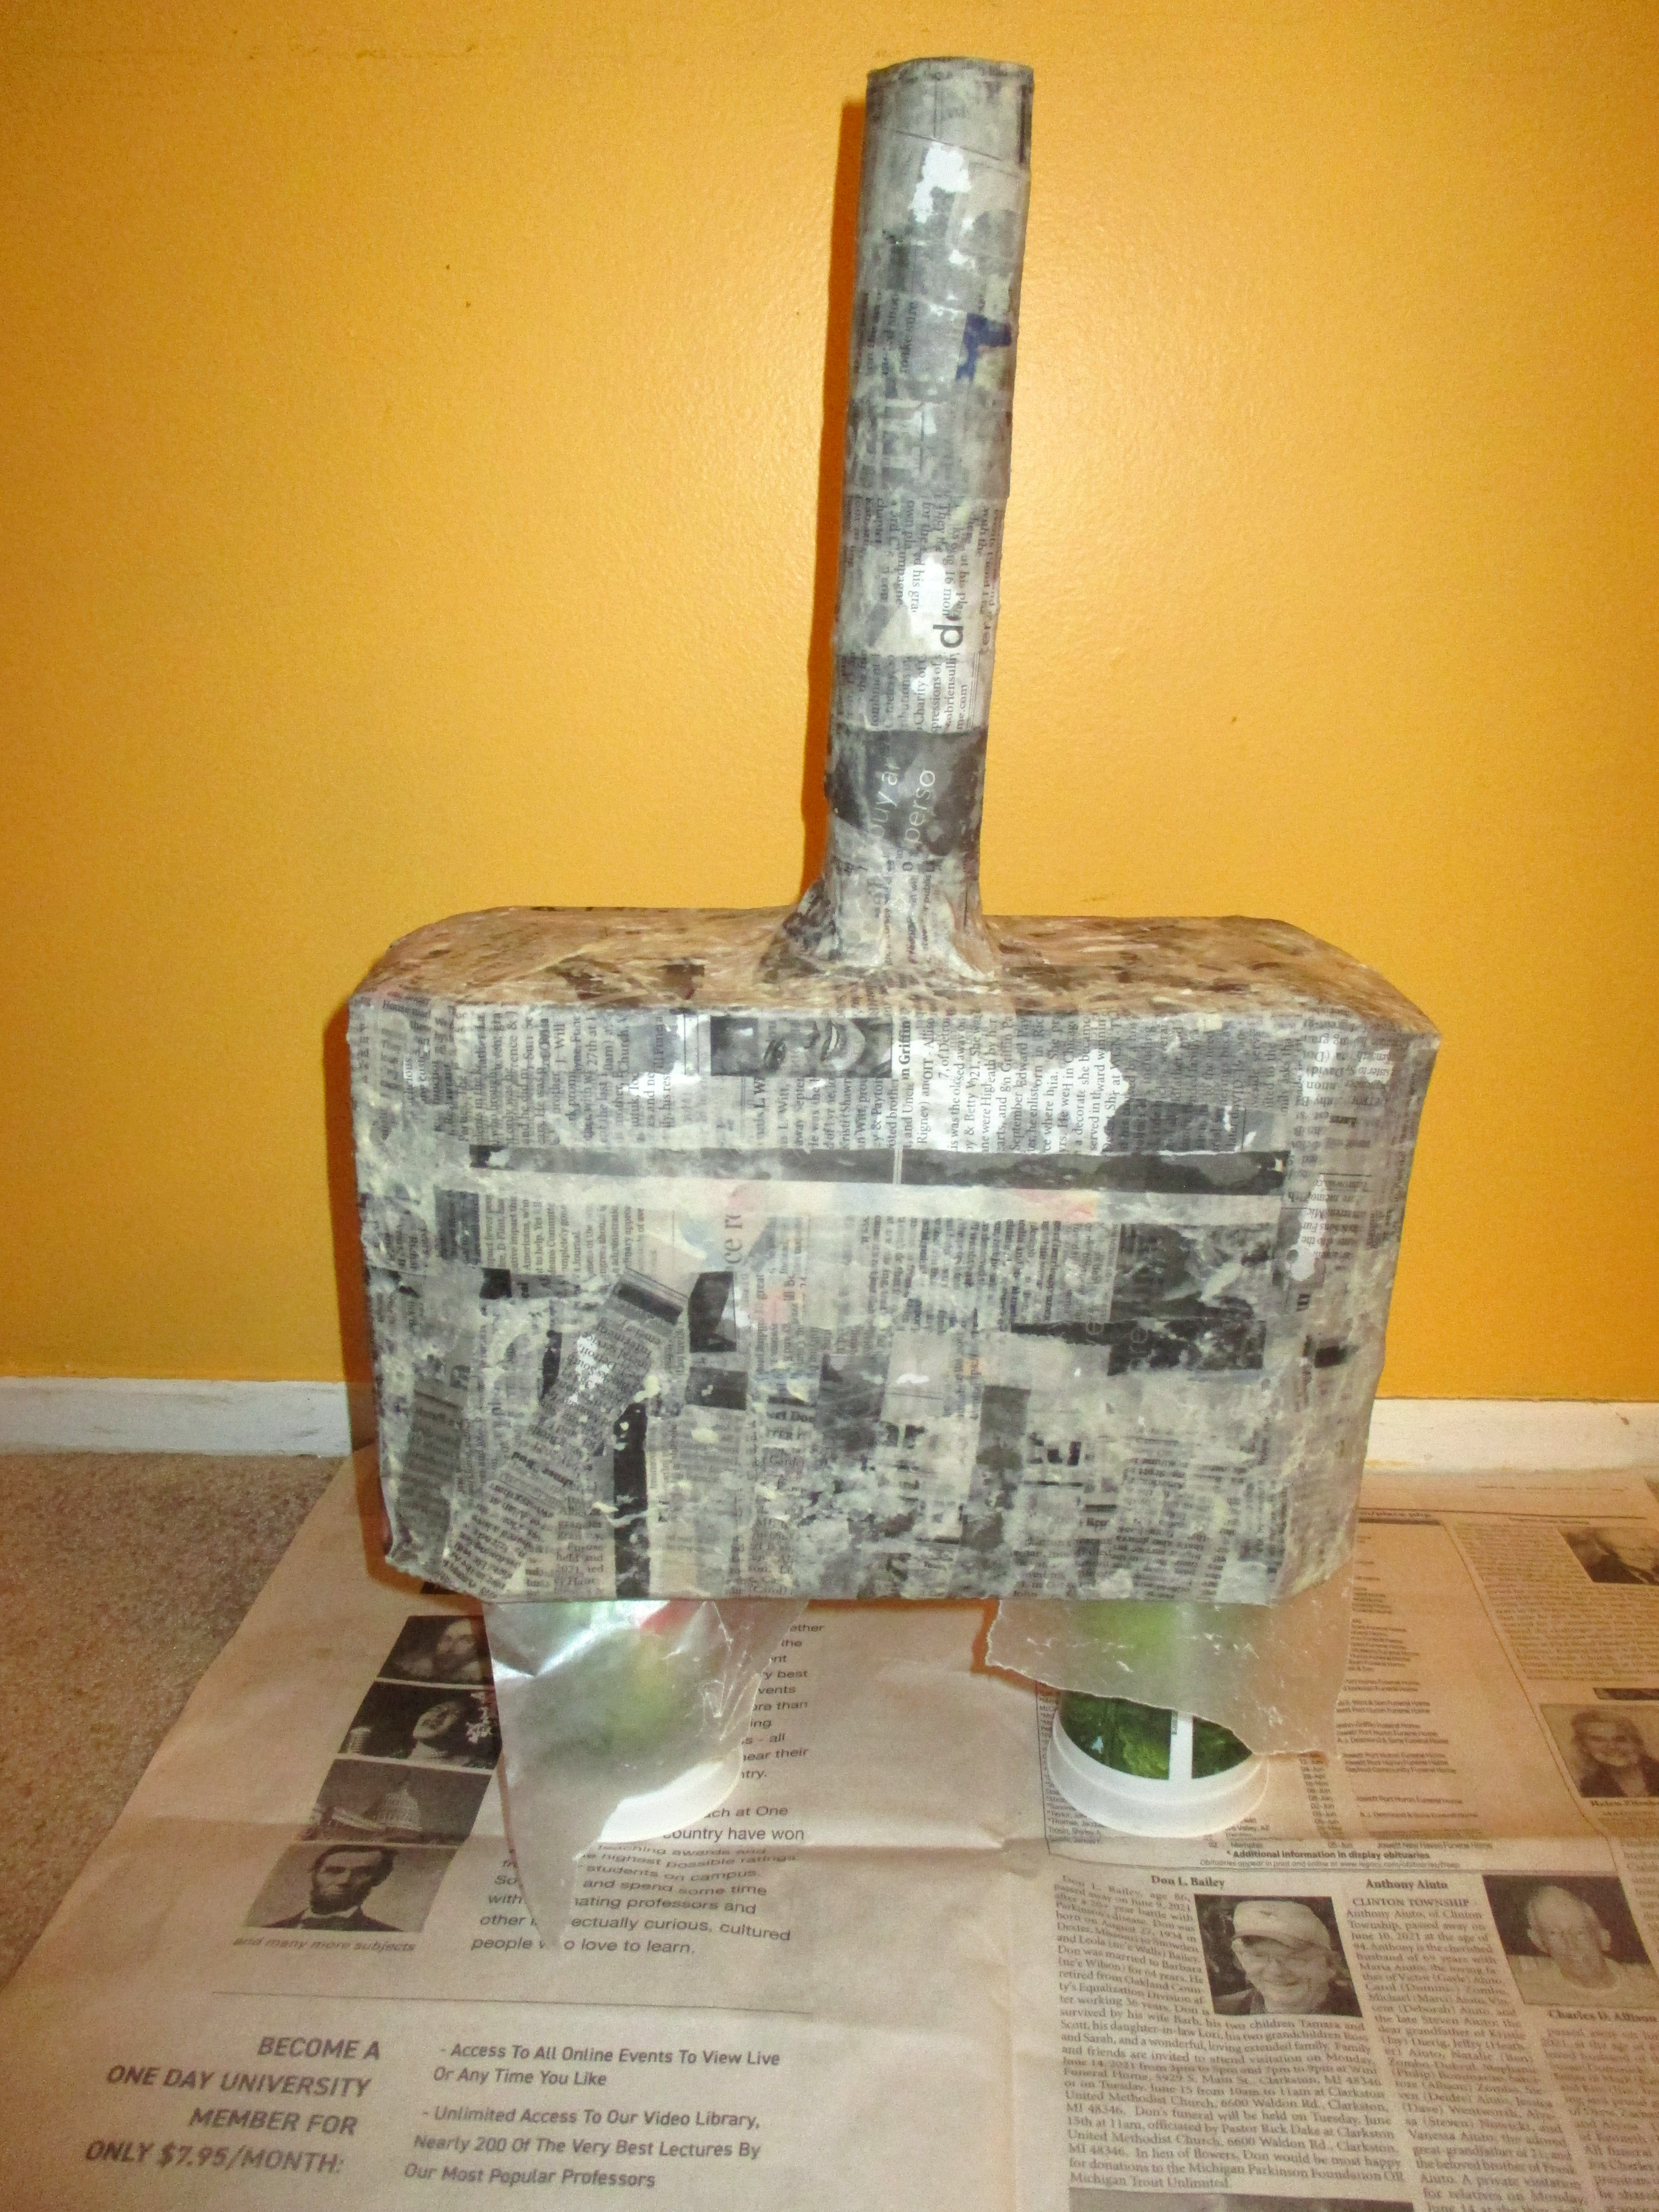
If you are new to the art of papier-mâché, check out my tutorial here. Using the glue, apply strips of newspaper all over the hammer. I like to do 2-3 coats. I apply extra layers around the handle where it attaches to the main part, as this will be need to be the most durable.
Allow your hammer to dry completely.
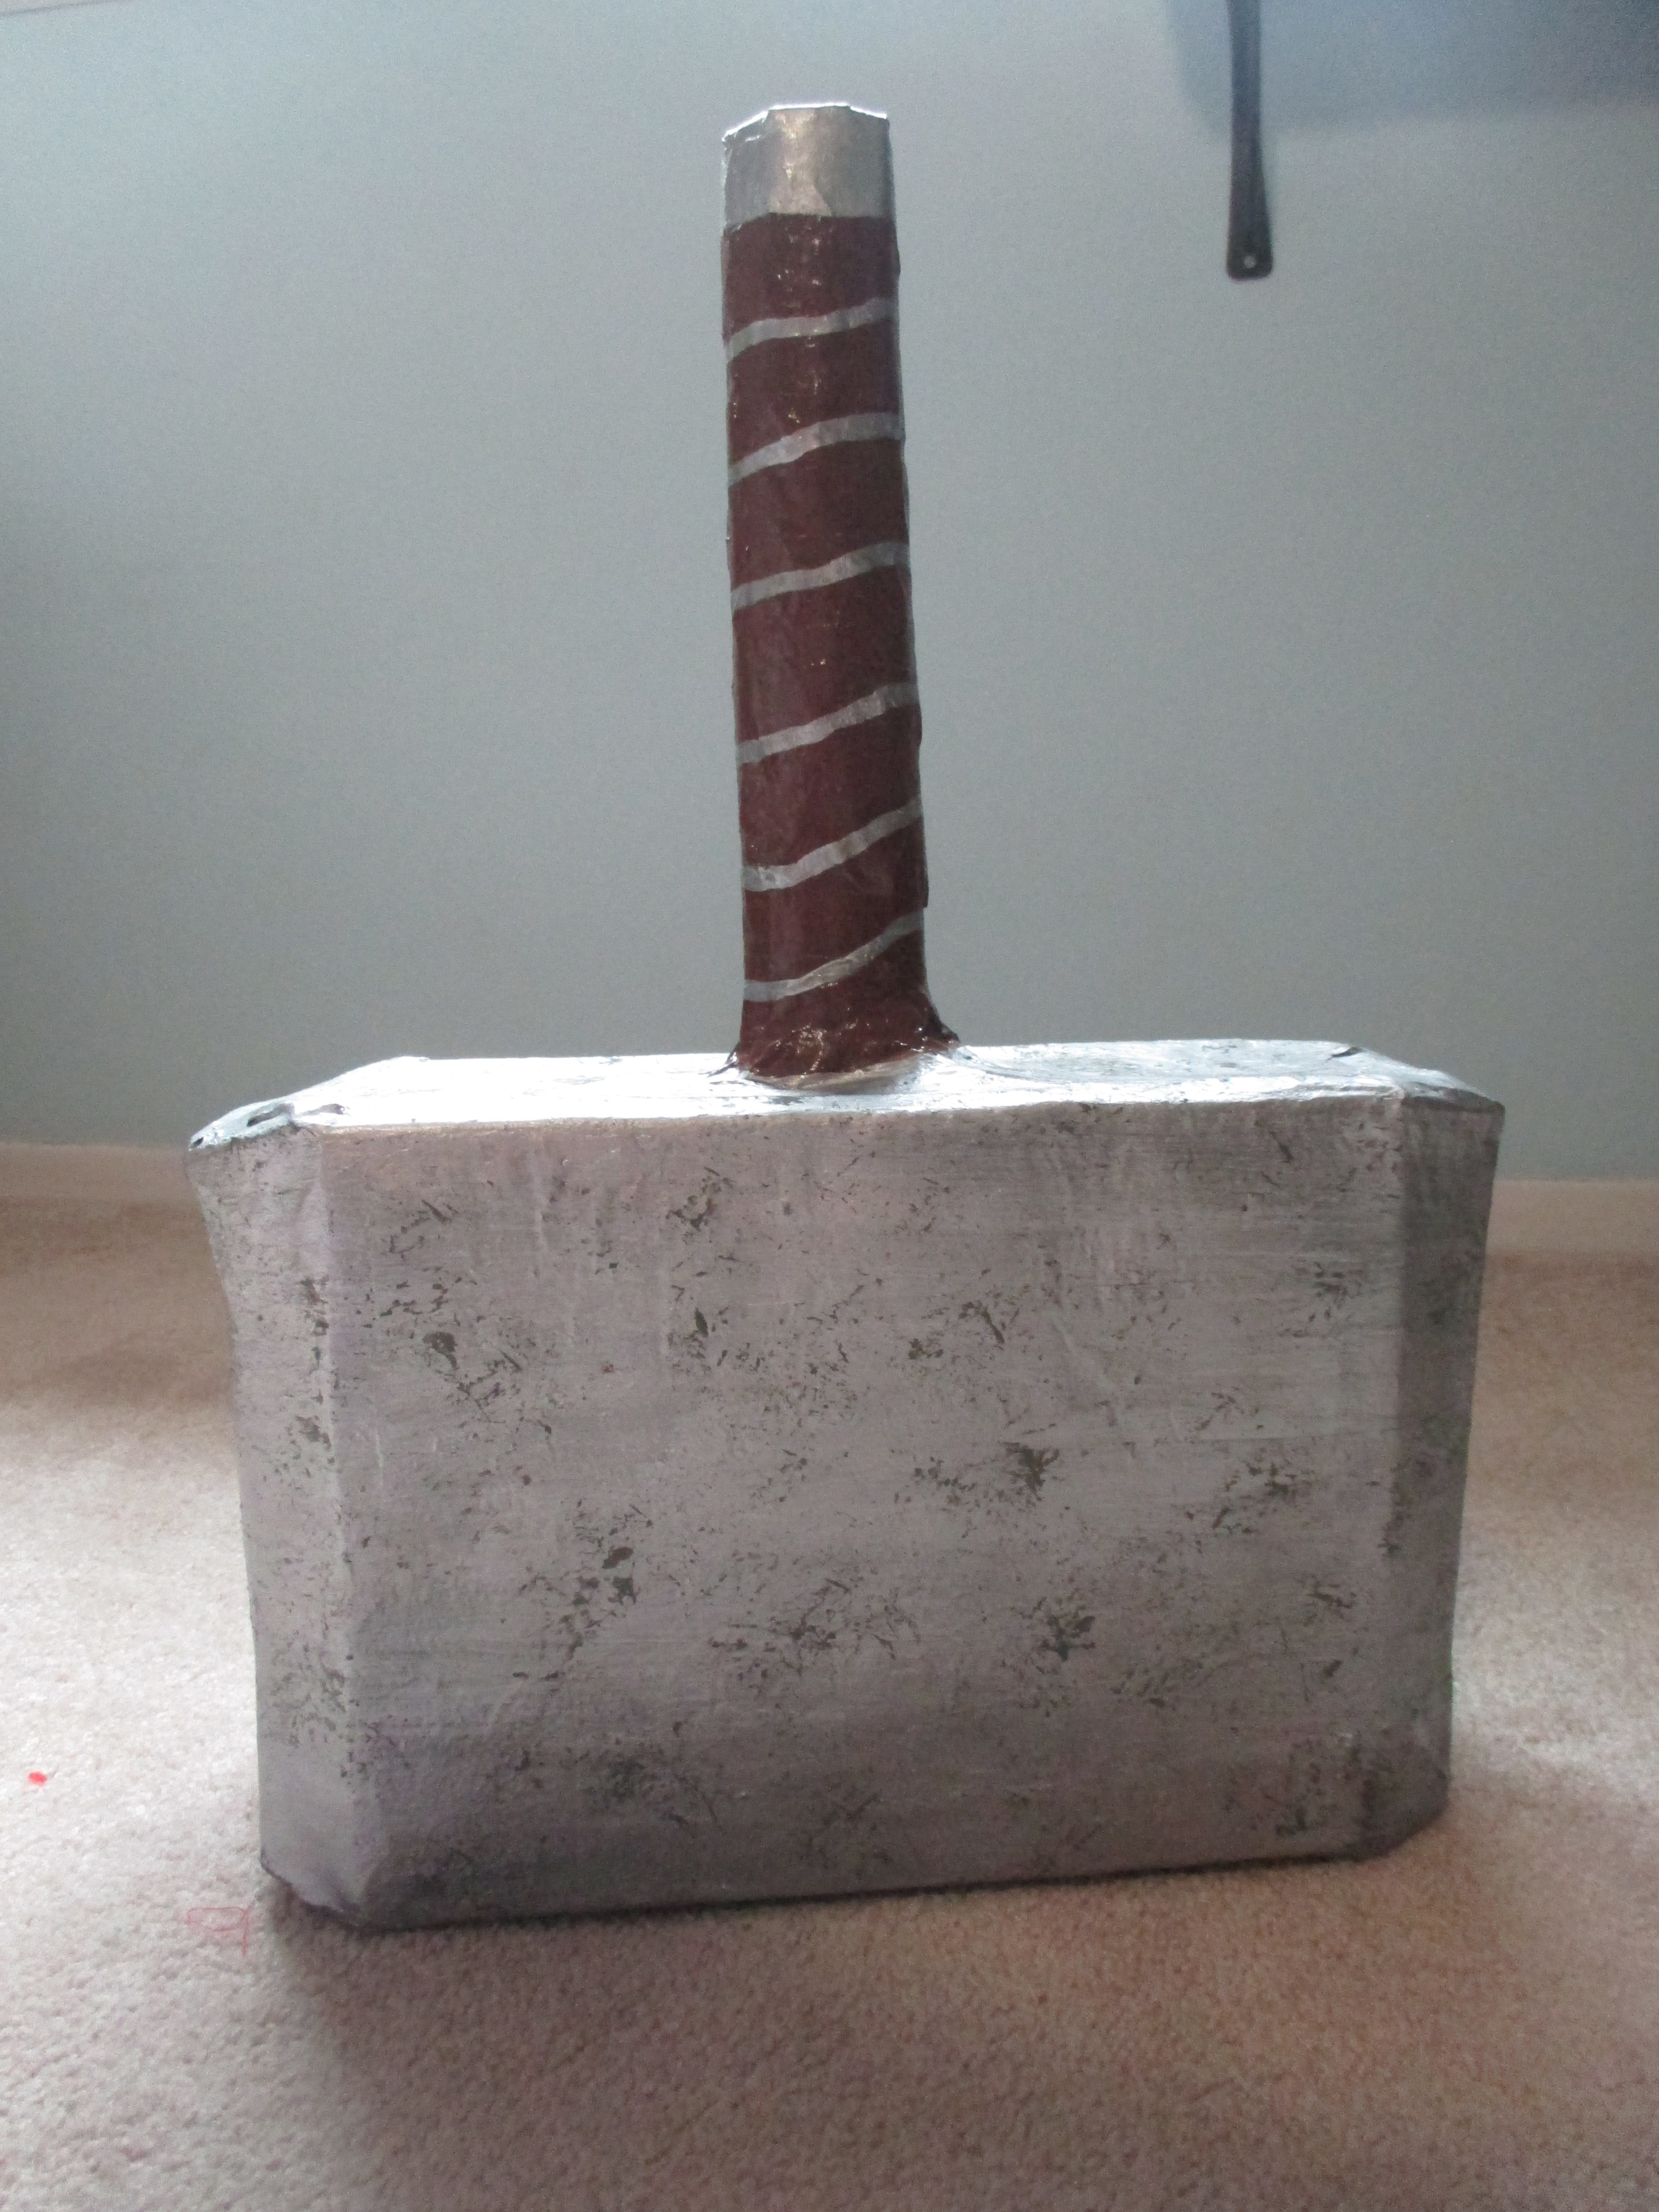
When Mjolnir is completely dry, use acrylic paint to decorate. To give a bit of extra protection, go ahead and add a coat or two of varnish.
Putting Together Loki
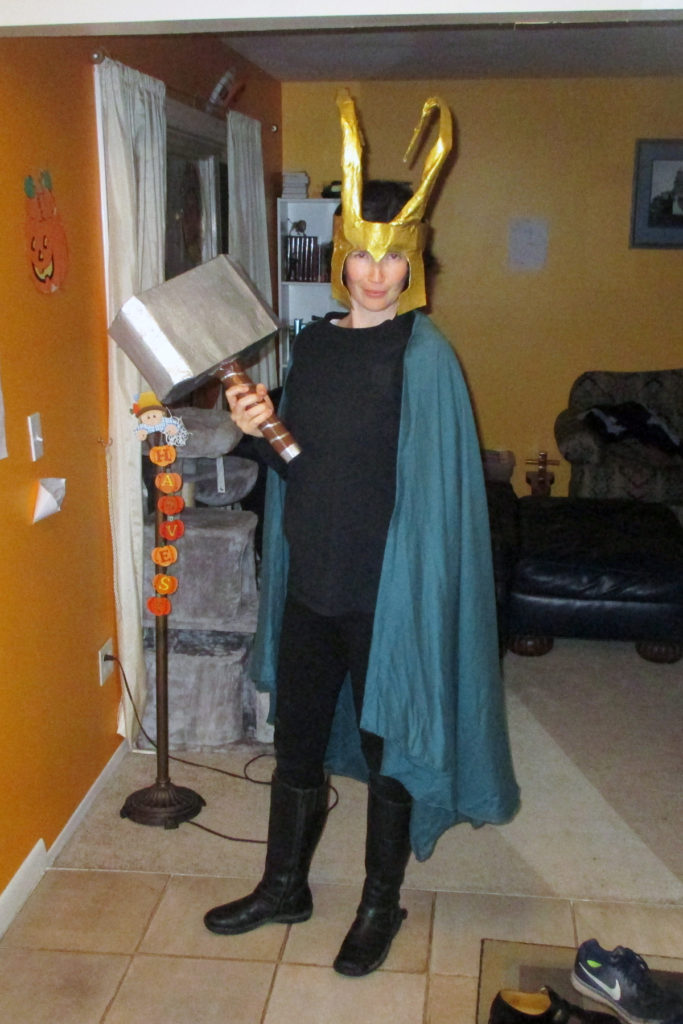
If you look at pictures of Loki, a lot of his costumes have quite the intricate details. I decided to keep him simple. After all, Halloween is just one day. I wore a base of black clothing, and I happened to have an old black wig. Unfortunately, the wig was very tangled up, so I had to be creative in making it work, but since the horns are the focal point, they drew the attention away from the rat’s nest of a wig;)
Loki’s Cape
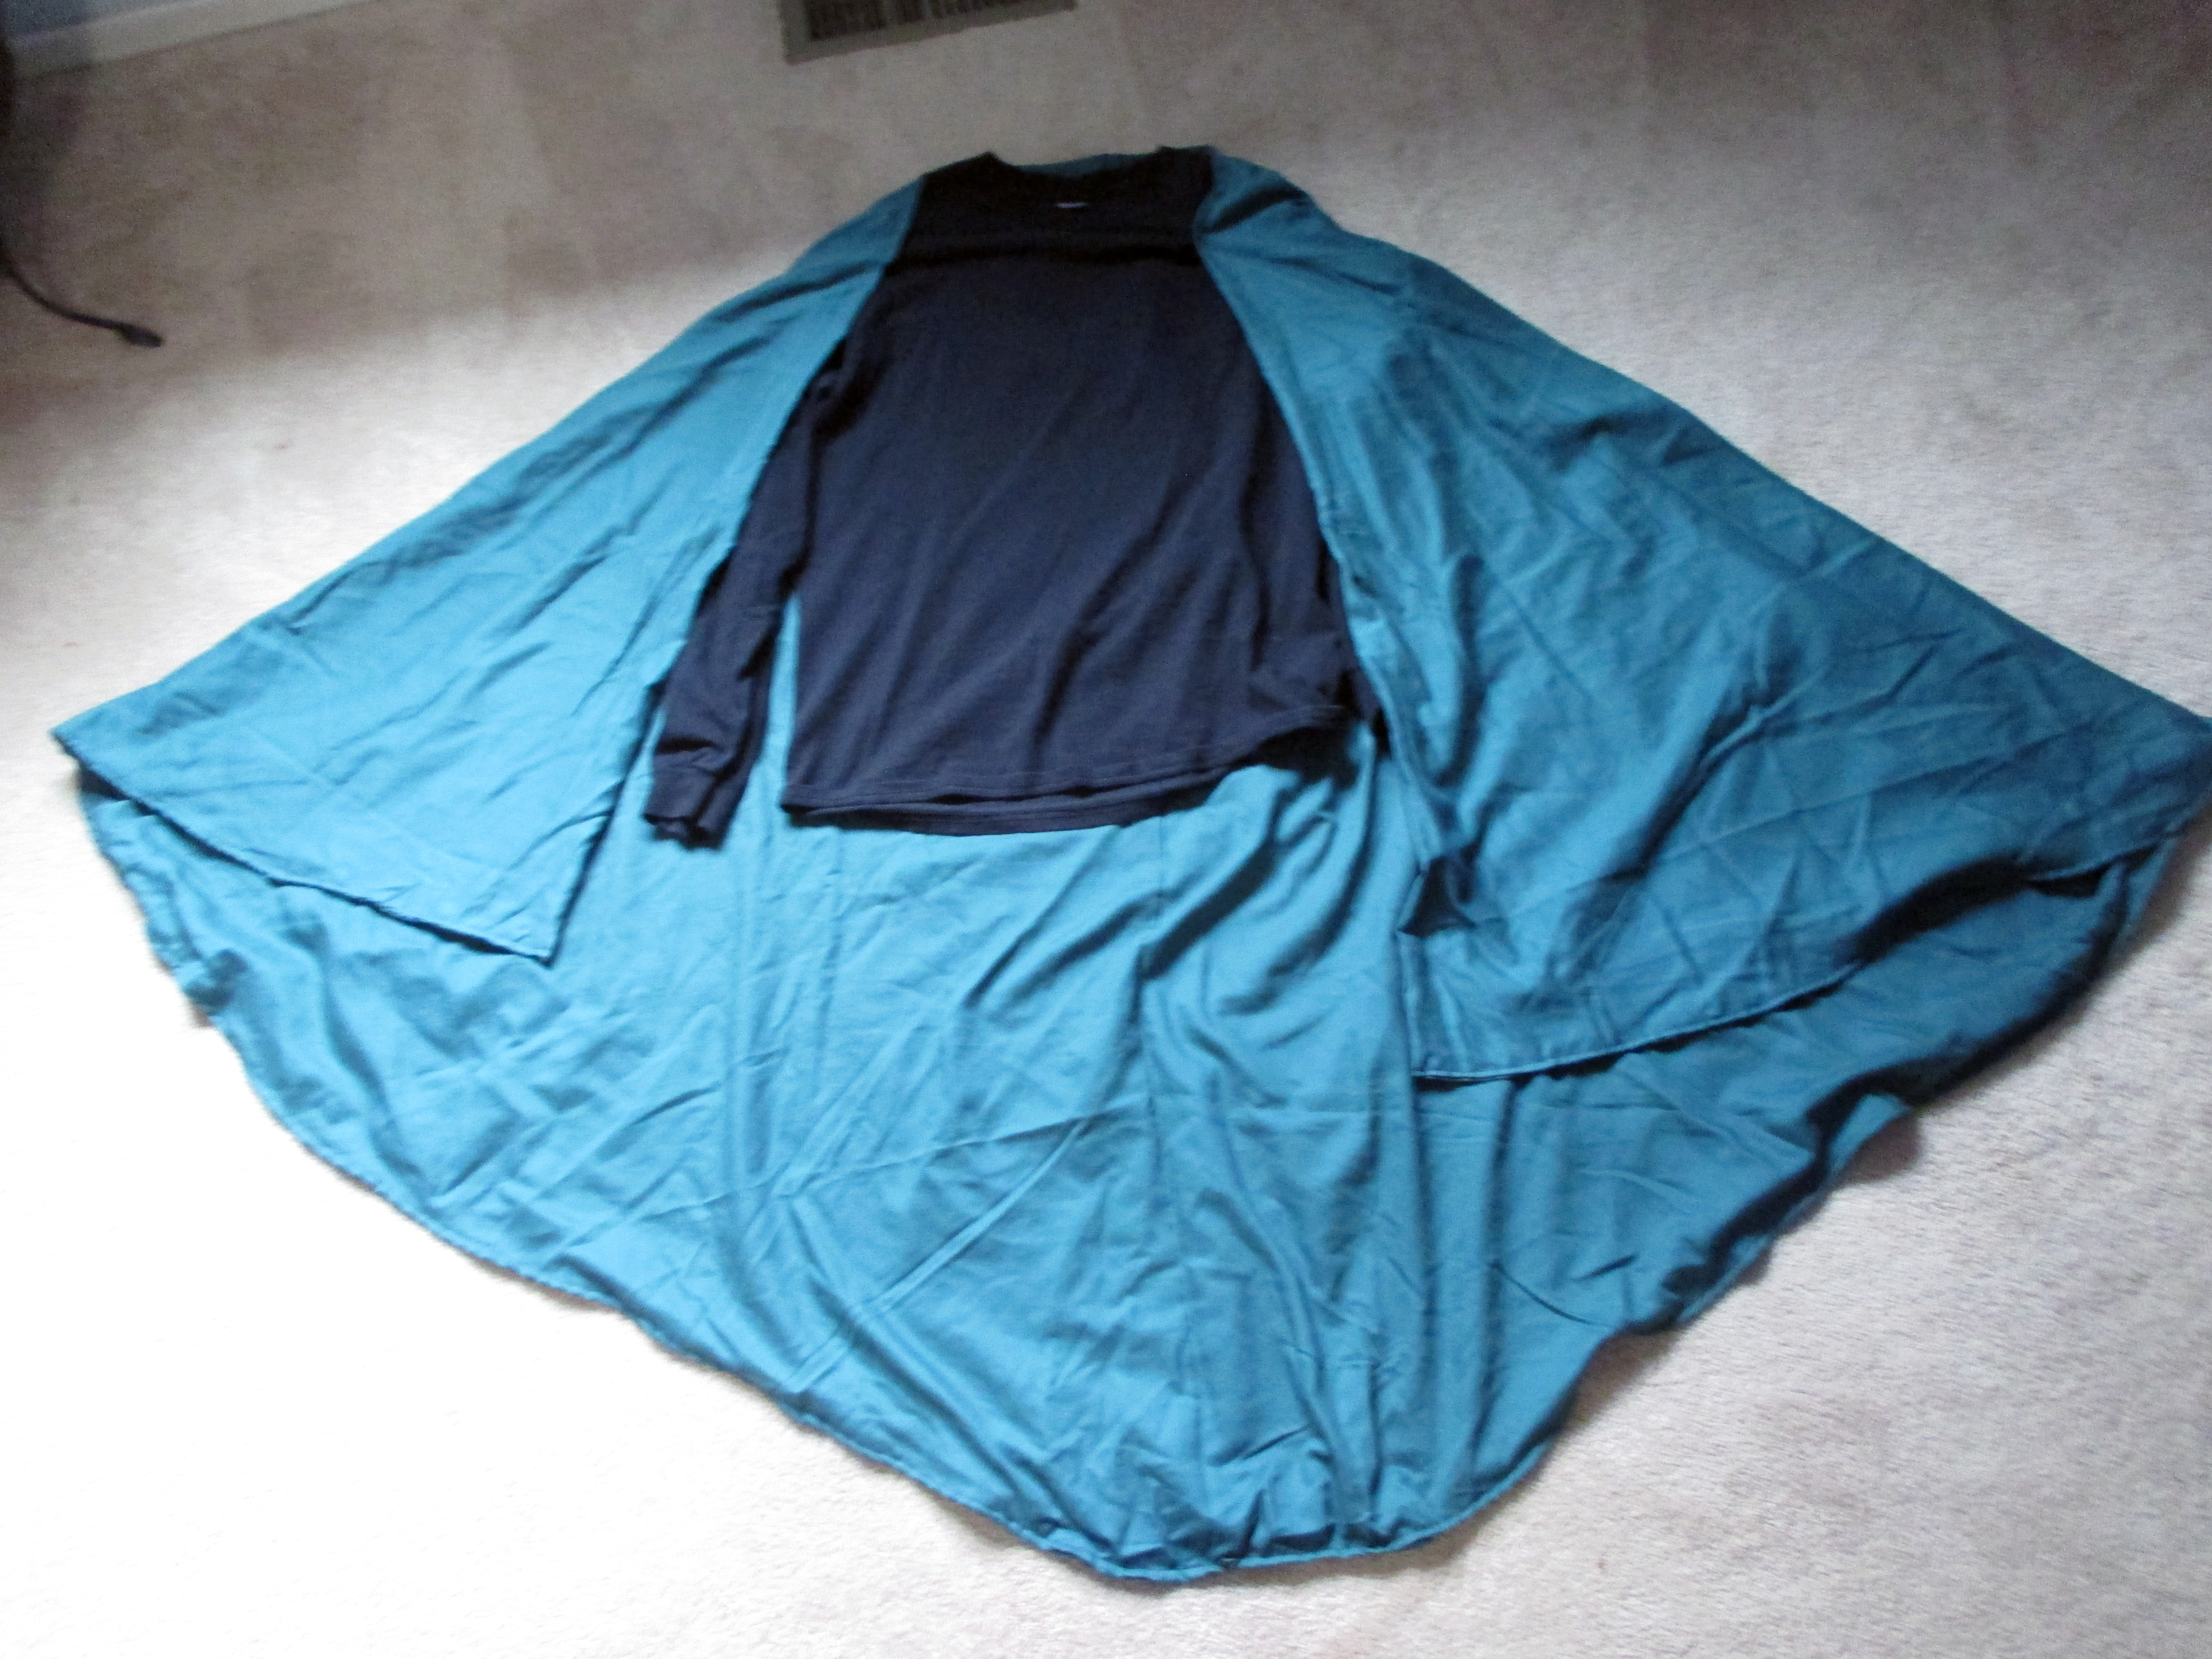
I happened to find a really cool green fitted sheet at the thrift store. Two green towels could also work if you aren’t as lucky in finding a sheet. The cape itself was pretty easy.
Step One: Cut the sheet into a circular shape (mine definitely wasn’t a perfect circle, so just do your best).
Step Two: Fold the circle in half. Fold in about a half inch of fabric to create a neat edge, then pin. Sew along the edge.
Step Three: Try on the shirt you will be wearing as part of the costume and line up where you want the cape to attach. Pin the cape to the shoulders and sew.
Loki’s Horns
These horns win the prize for most tedious thing I have ever tried to papier-mâché in my life, but they turned out pretty great.
Step One: Build the base. Using thin cardboard, measure a band that will fit around your head. If you are going to wear a wig, make sure you measure with the wig on.
Step Two: Cut and attach the pieces coming down the side of your face, making sure they line up where you want them to be on your face.
Step Three: Roll up two pieces of cardboard and curve them like horns. Use tape to help them keep their shape. Attach them to the cardboard using more tape.
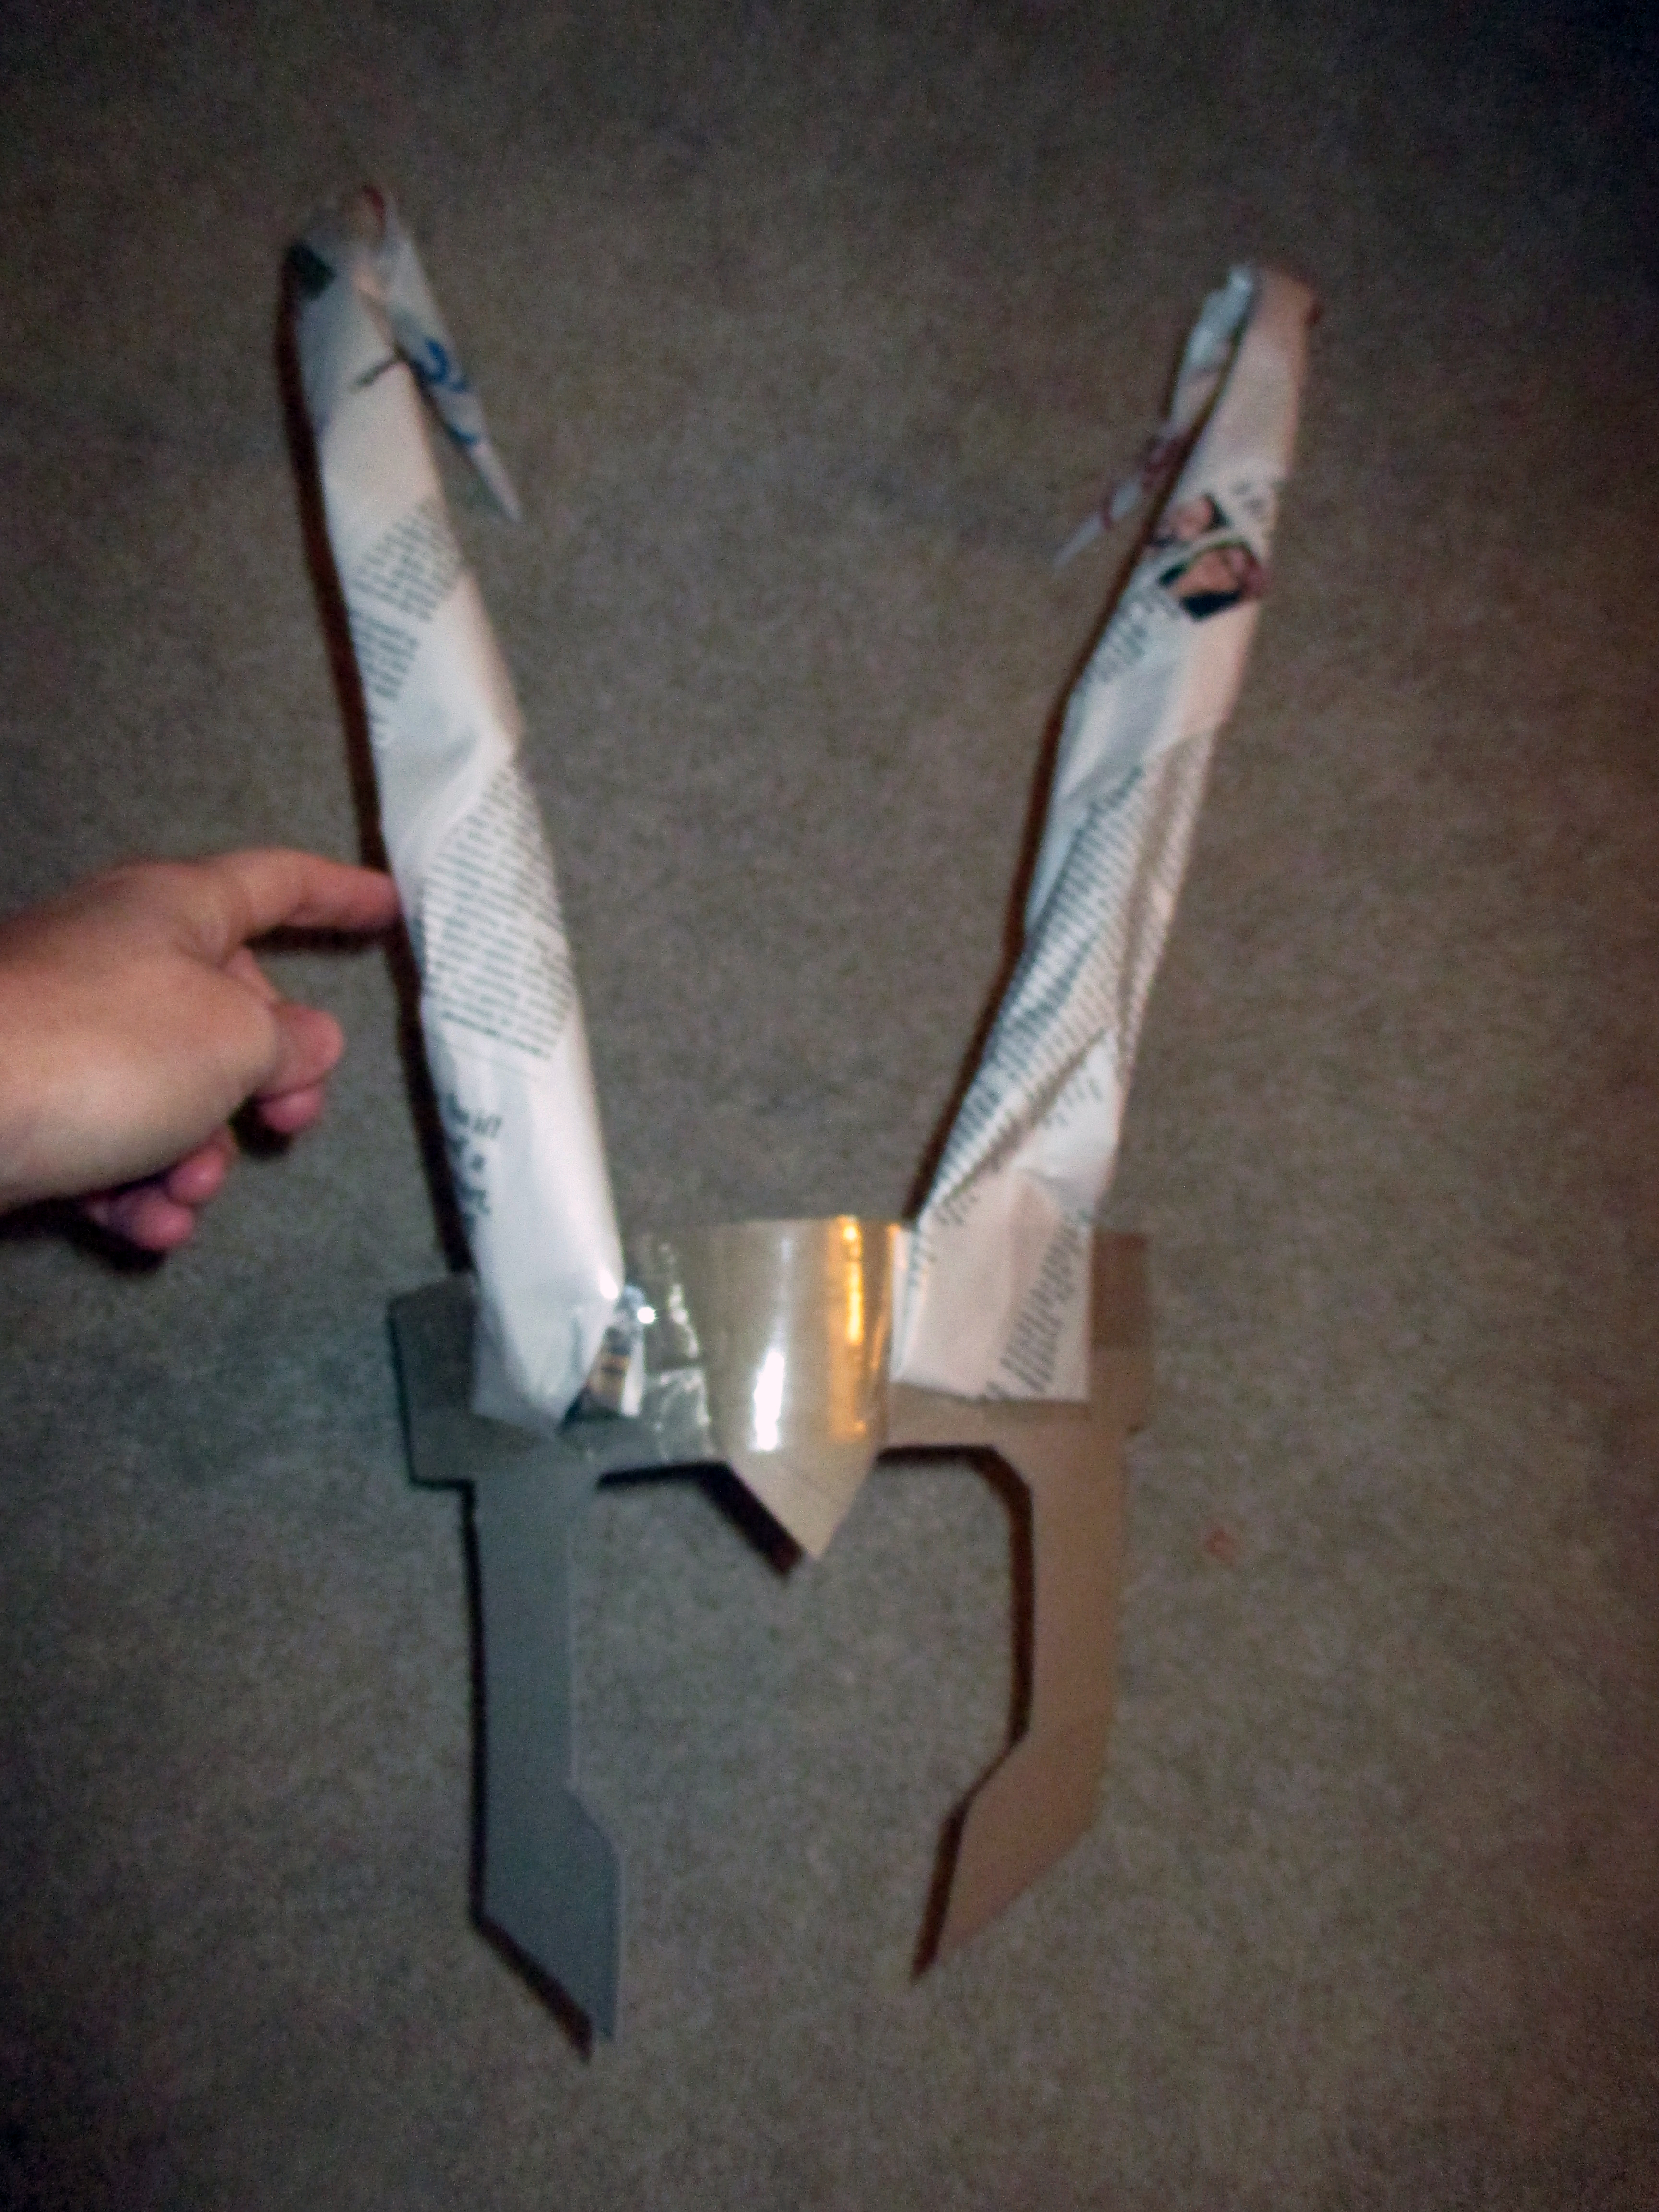
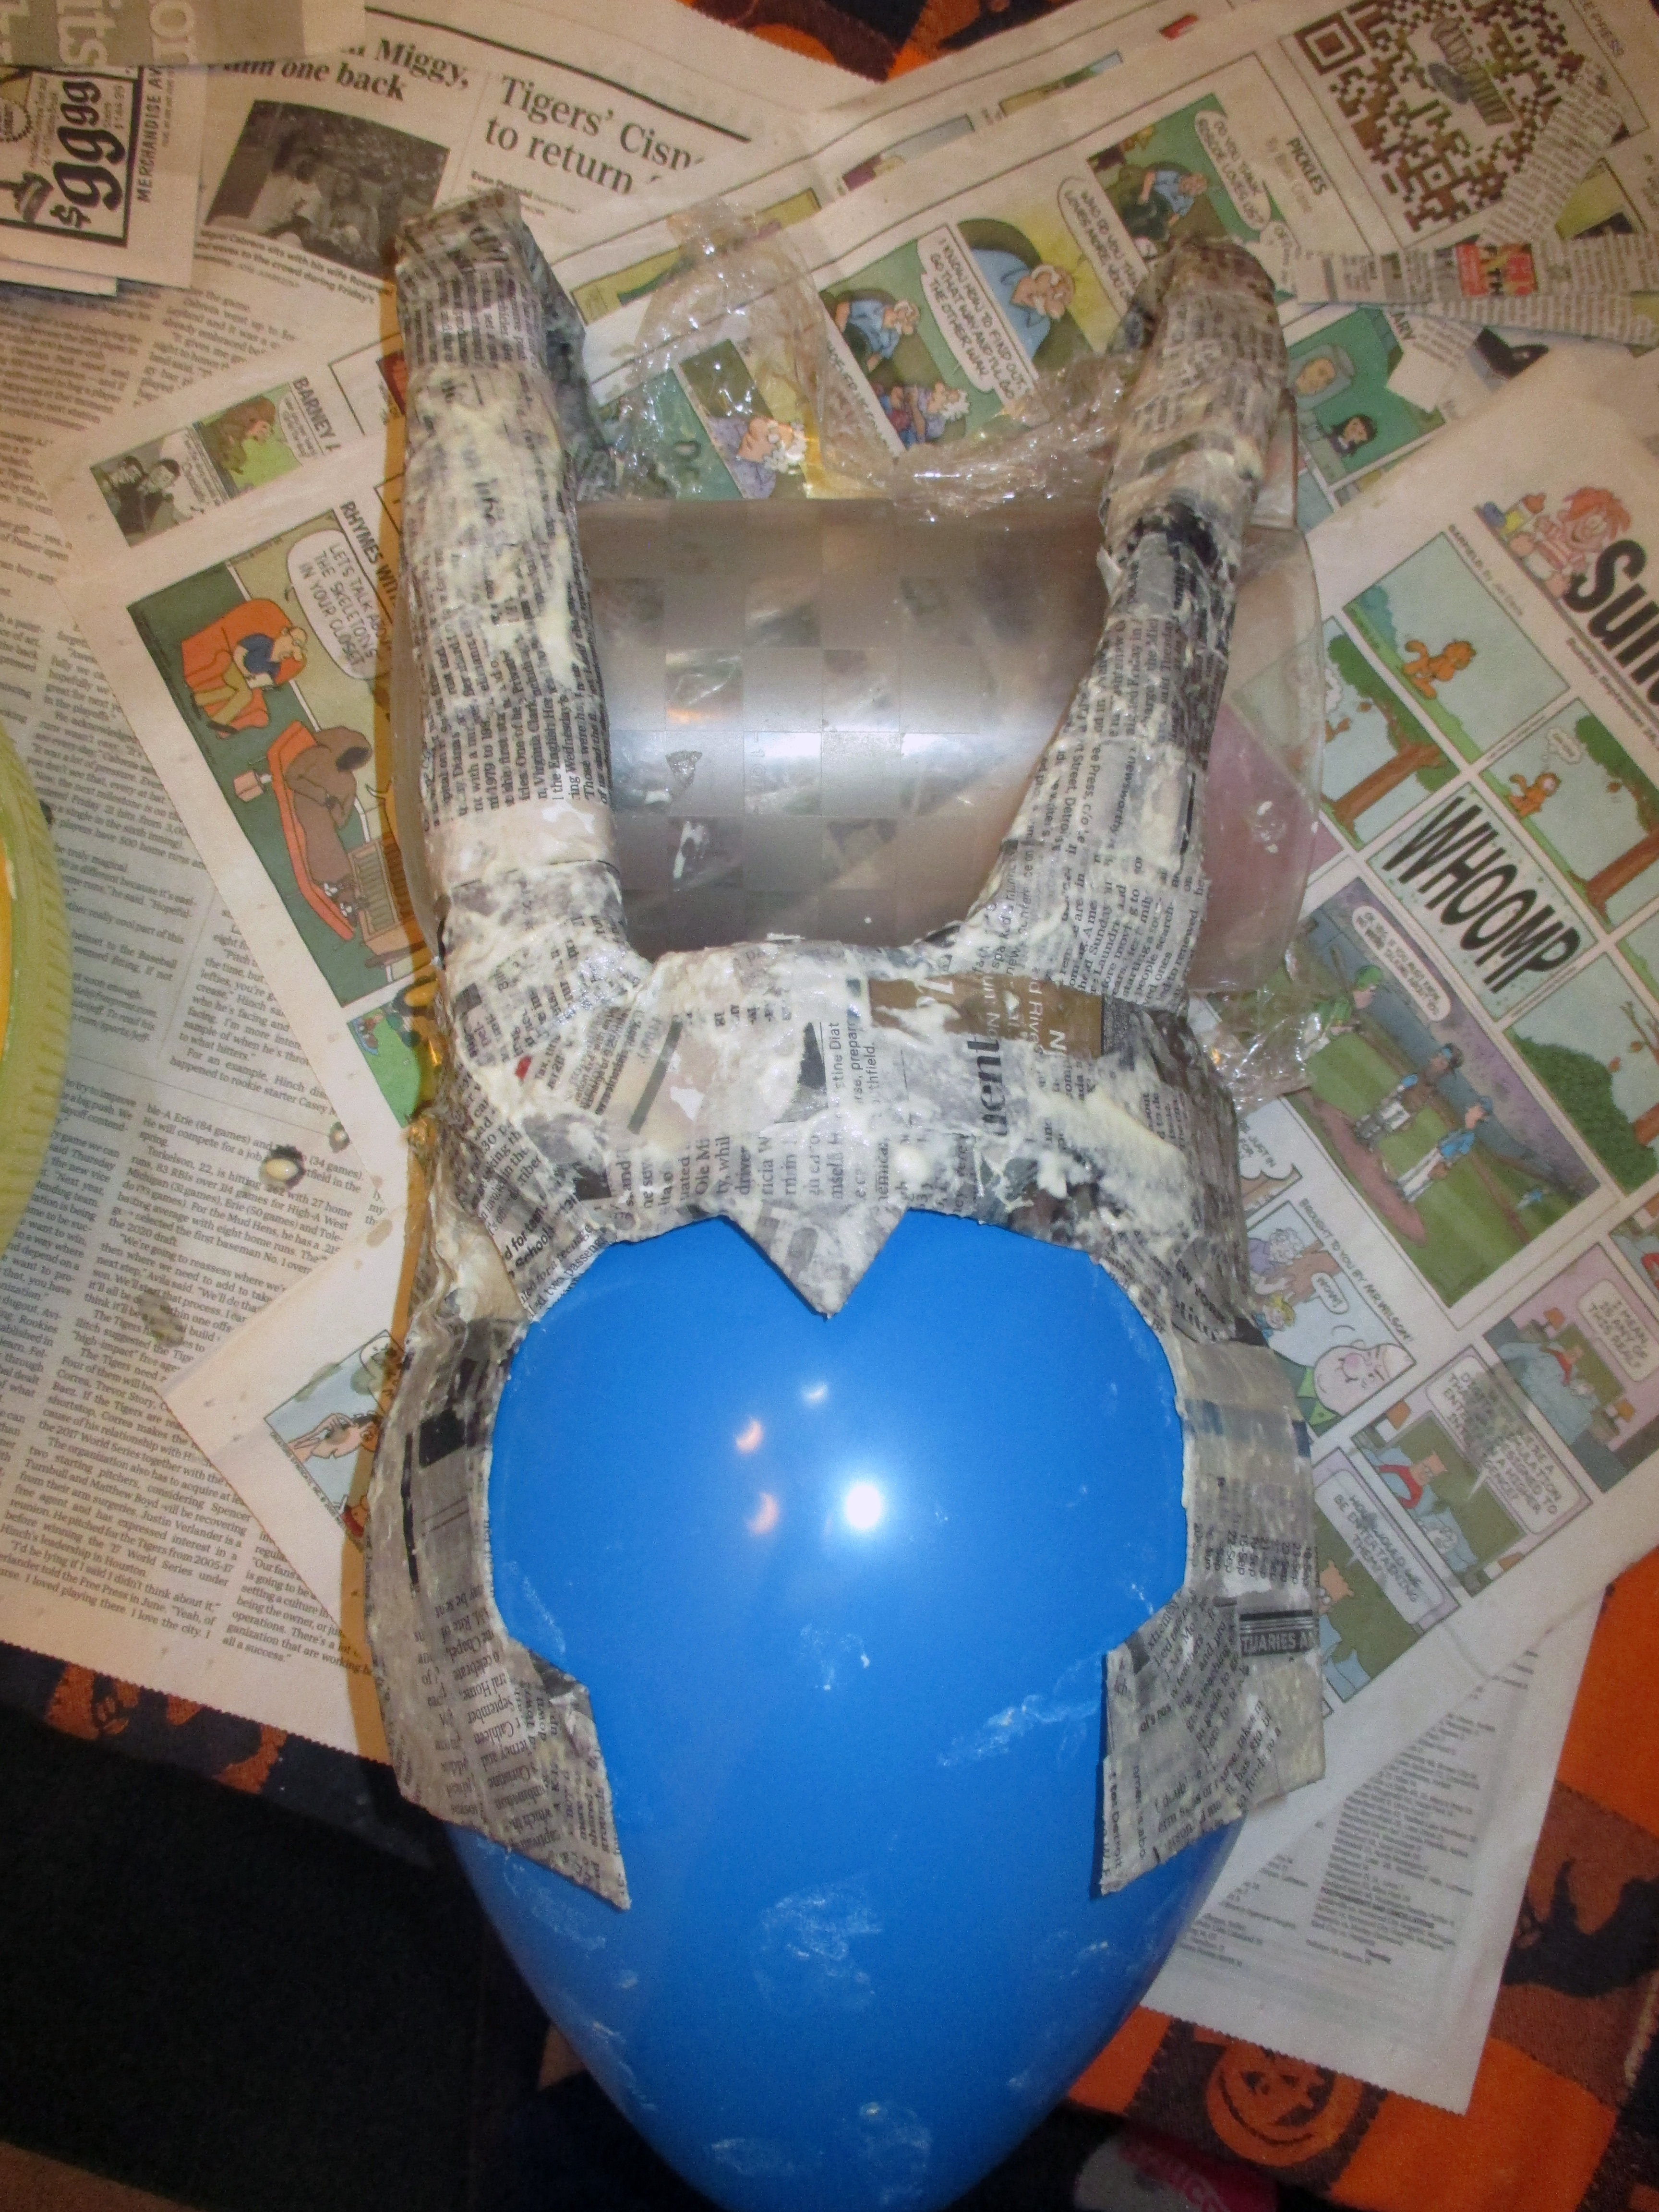
For the next step it is important to find a way to maintain the shape of the horns and the band while you are gluing. I highly recommend blowing up a balloon and using that as a “head”. I also used a pitcher with some plastic wrap to put the horns around. As soon as the cardboard and newspaper get wet, they will start to droop, so it is VERY important to have some support underneath.
Again, this is a very tedious process, but it’s possible and so worth it. Work your way around the band and the horns, adding as many layers as you can to make it durable.
Let it dry completely.
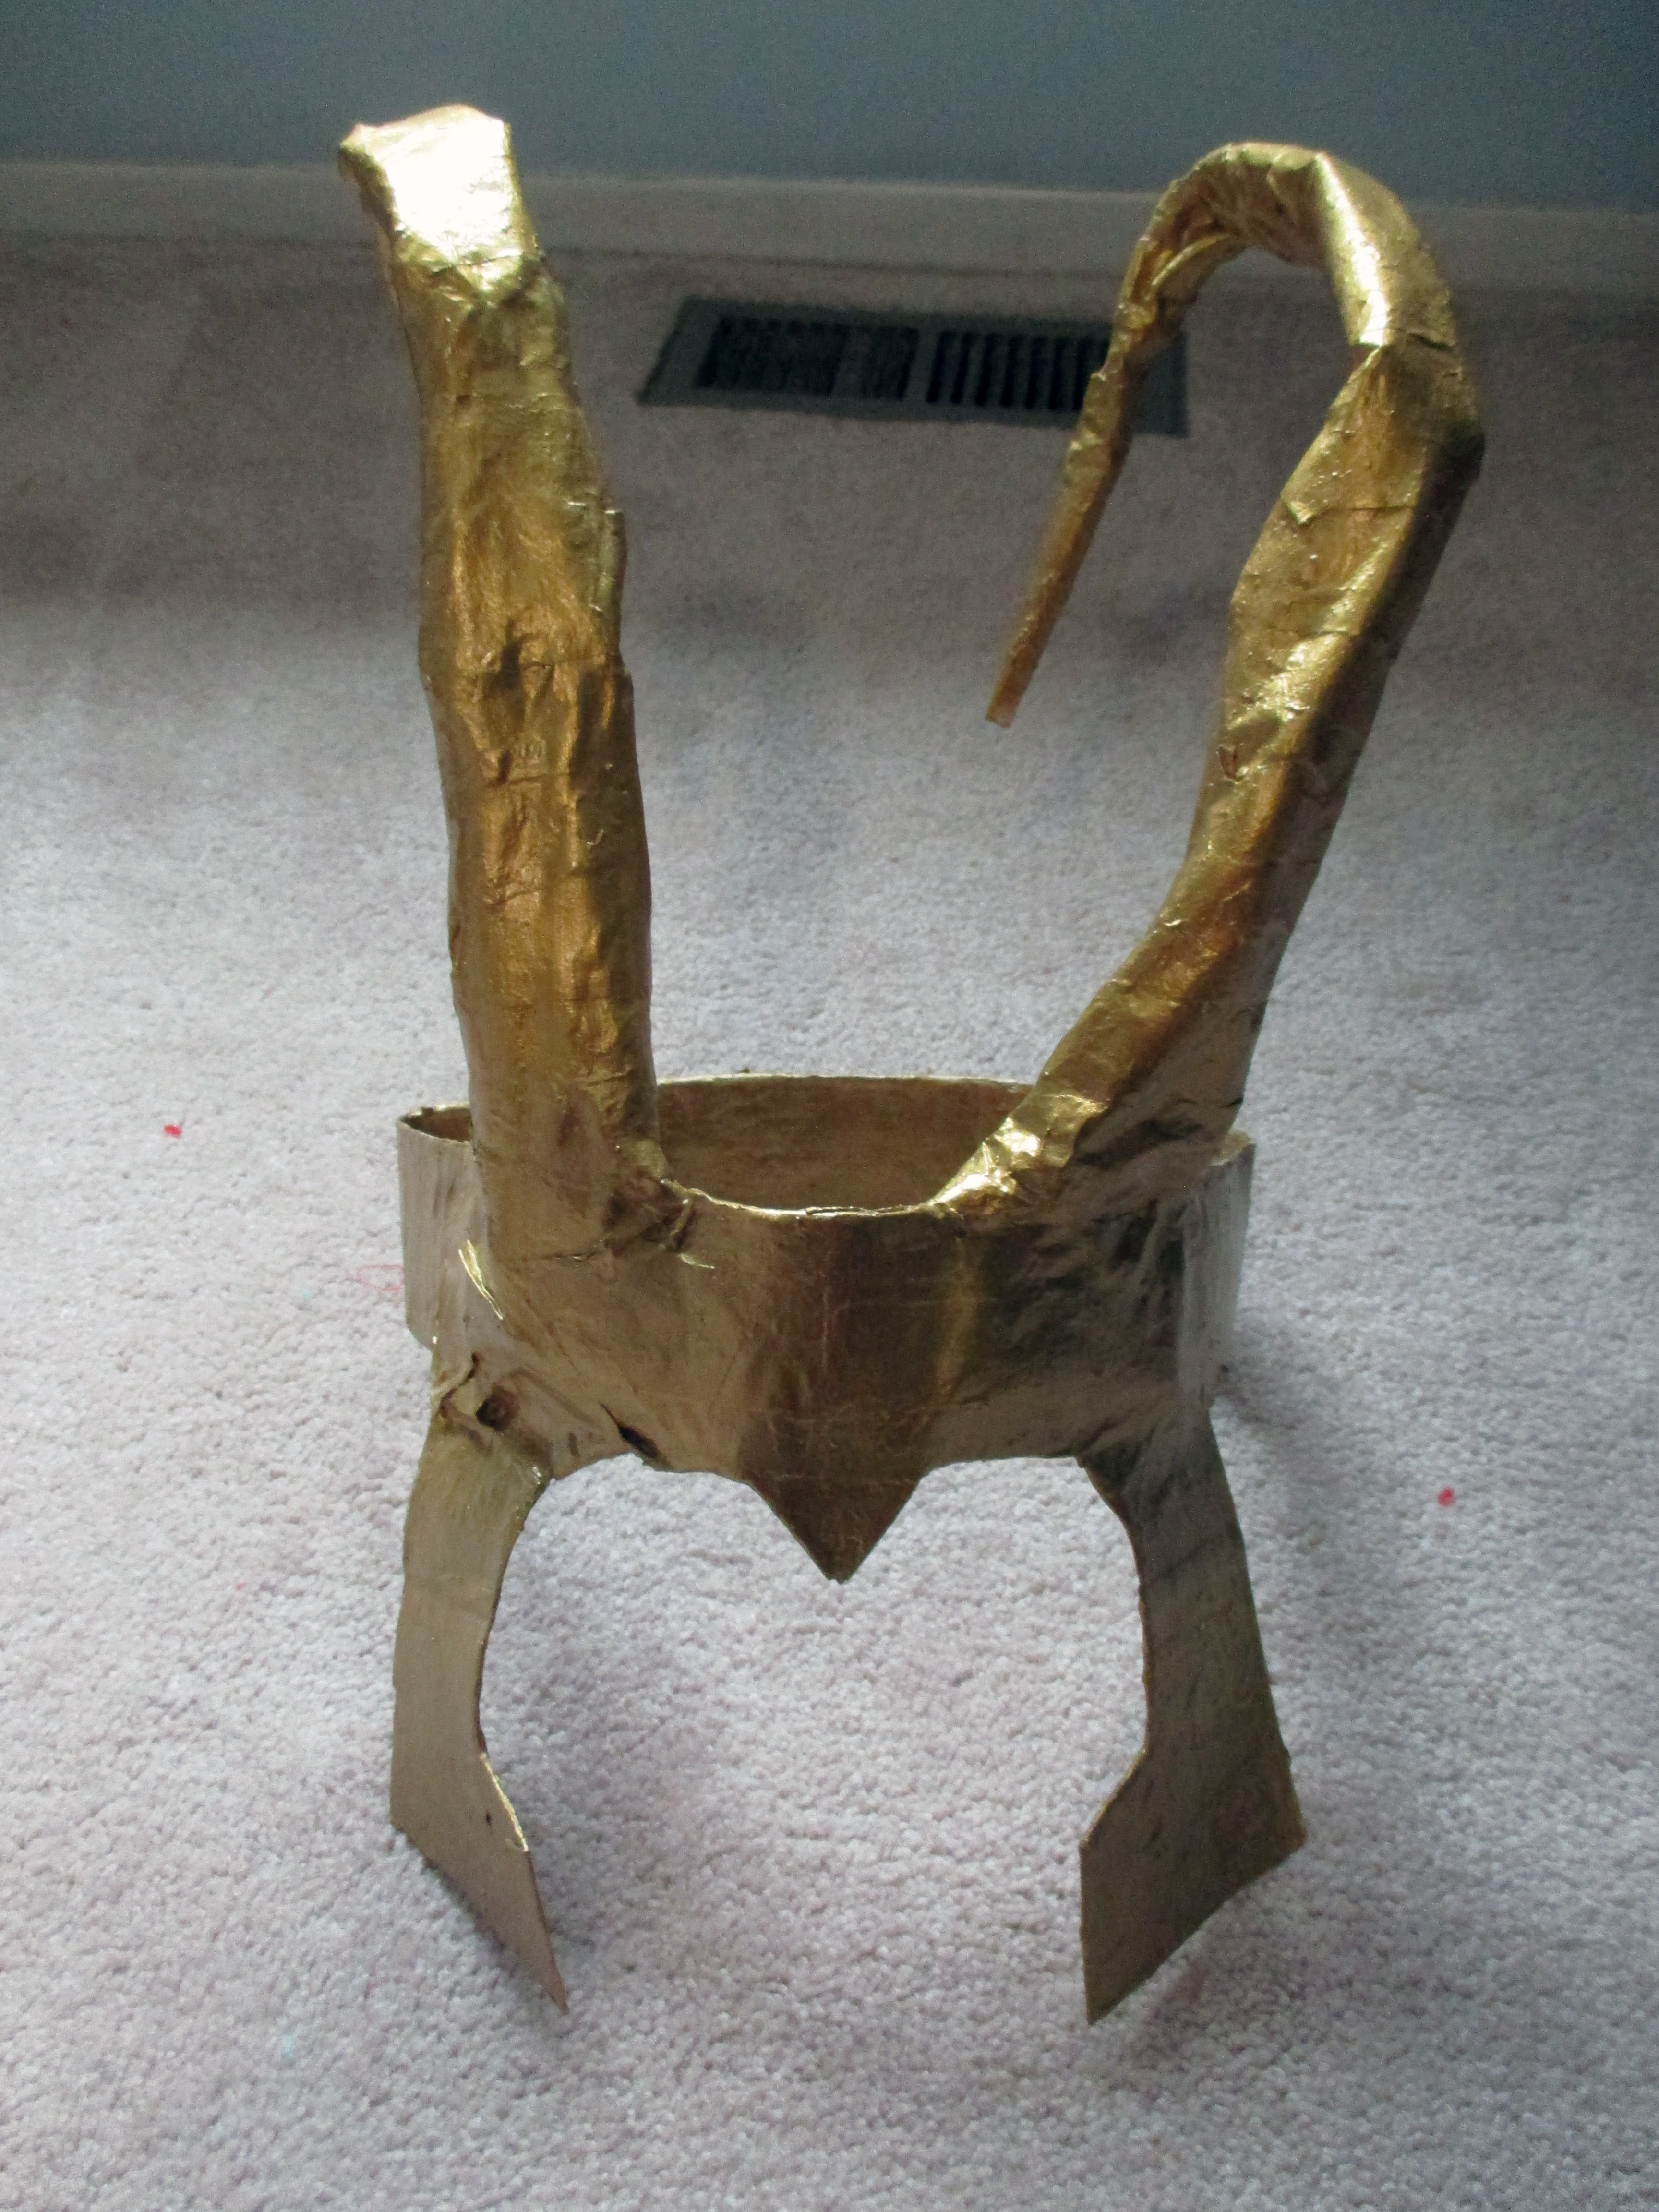
Once your headpiece is completely dry, add some gold paint. Again, feel free to varnish after that for an extra shine and to protect the paint job.
So there you have DIY Thor and Loki costumes. To see more Avengers costumes, I have tutorials for Black Panther, Hulk, Captain Marvel, and Scarlet Witch. Check them out!