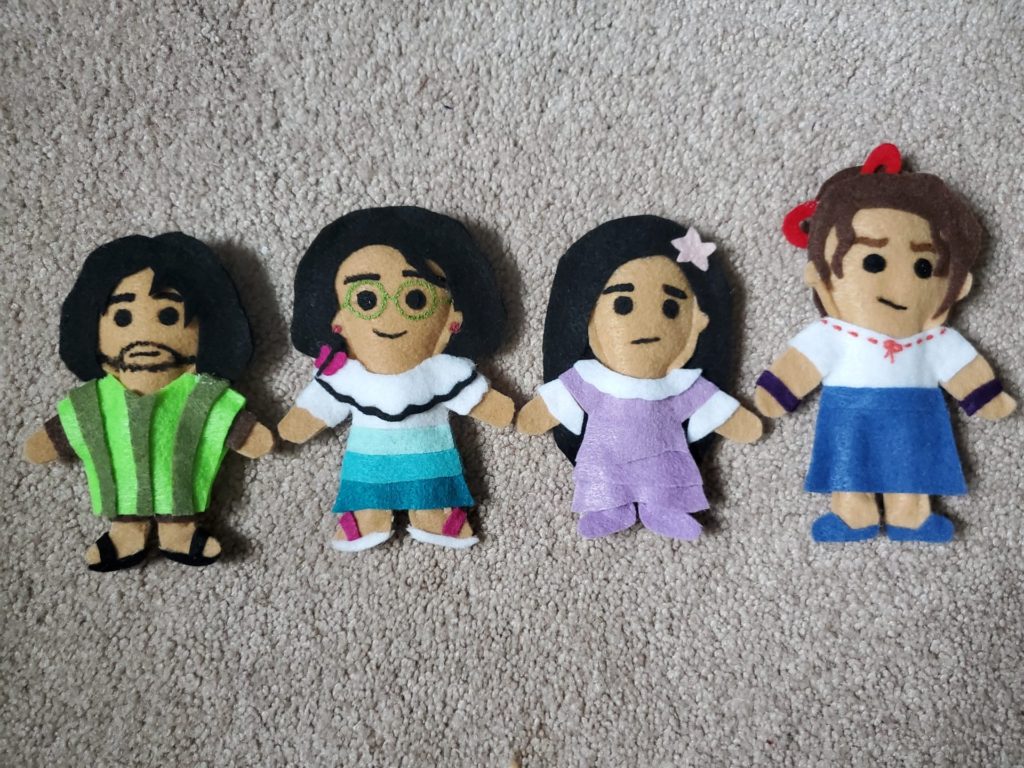
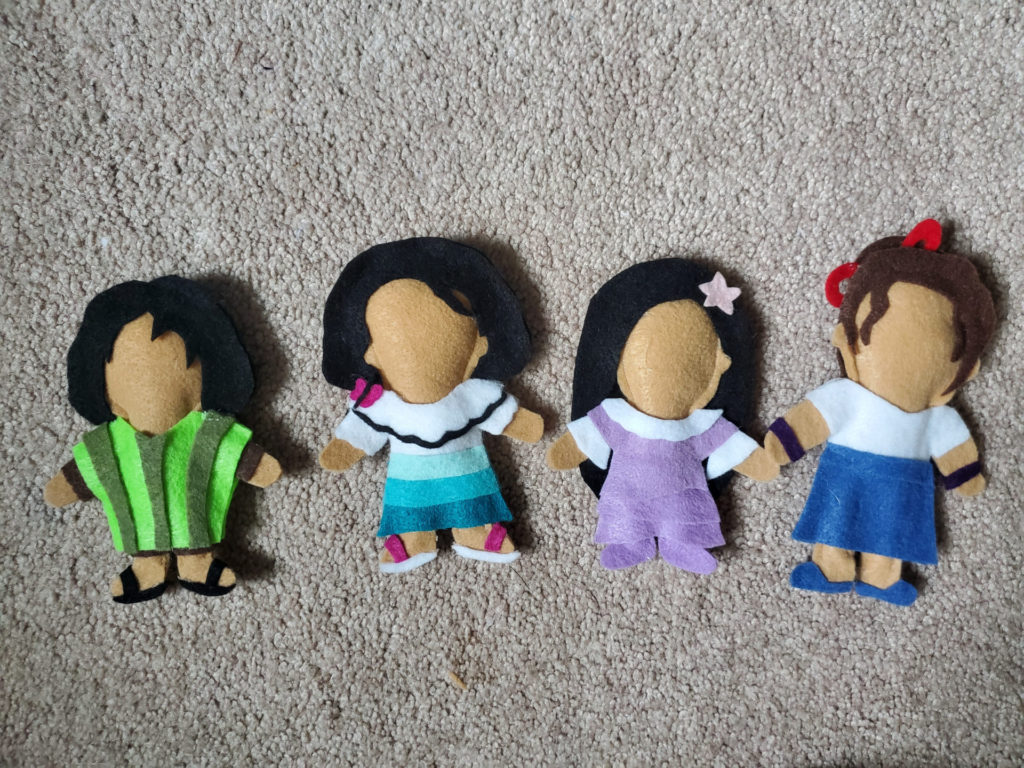
Like many people, my family enjoyed watching “Encanto”. We’ve seen it twice (which is probably way below average), but it was enough for my kids to suggest I make some Encanto dolls. How could I refuse? The first installment consists of Bruno, Mirabel, Isabela, and Luisa. I have plans for two more sets as well, so stay tuned for those!
Patterns for Encanto Dolls
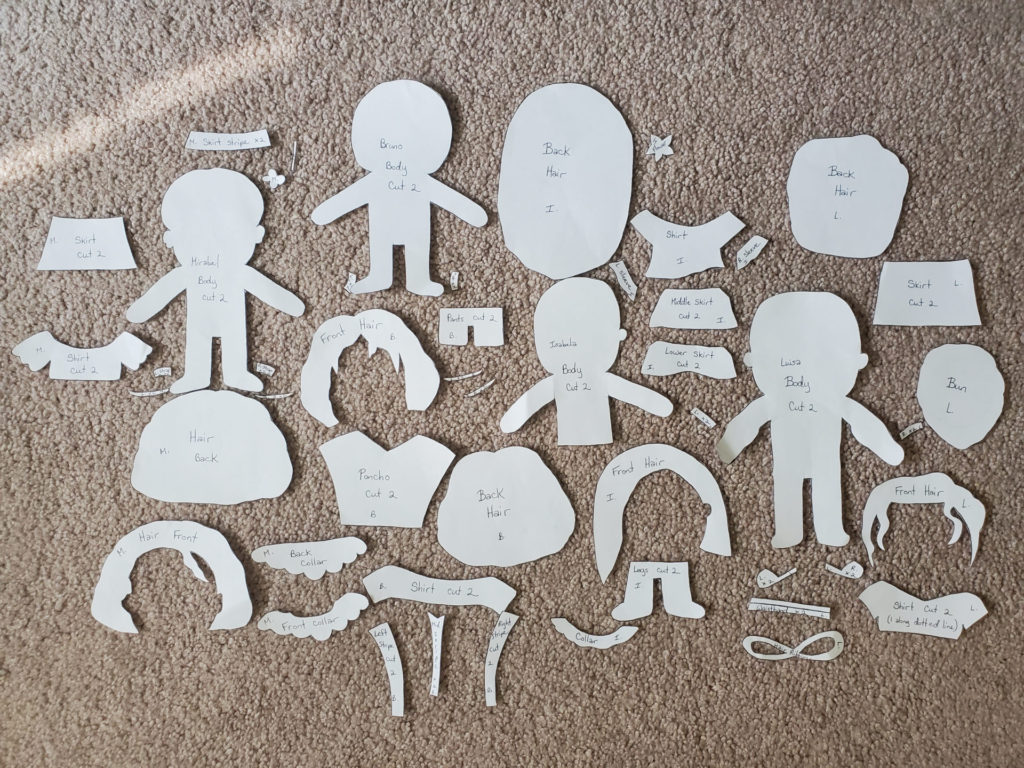
Attached are the pattern pages for each of the dolls; 1 page per doll. You can either print the patterns on paper, or transfer the patterns onto something sturdier, like cardboard or card stock.
As with all of my dolls, this post contains step-by-step instructions, with pictures included. If you need some clarification on piece placement, or just want to see how it all goes together, you can check out this video:
Step One
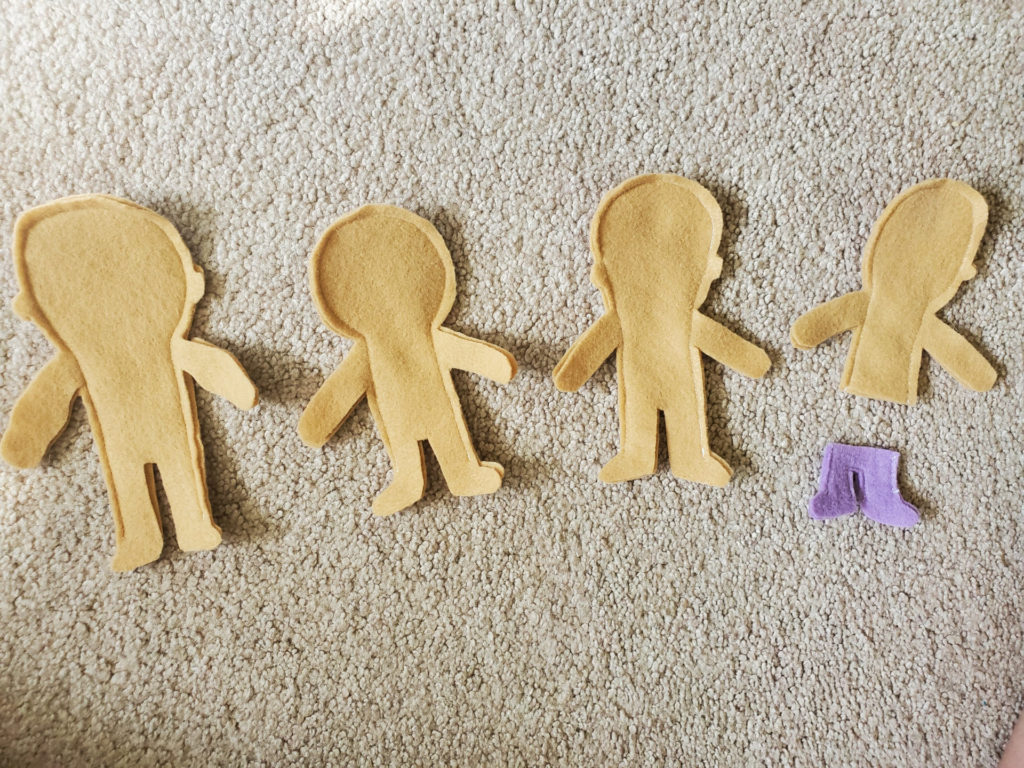
Print and cut out the pattern pieces.
Step Two
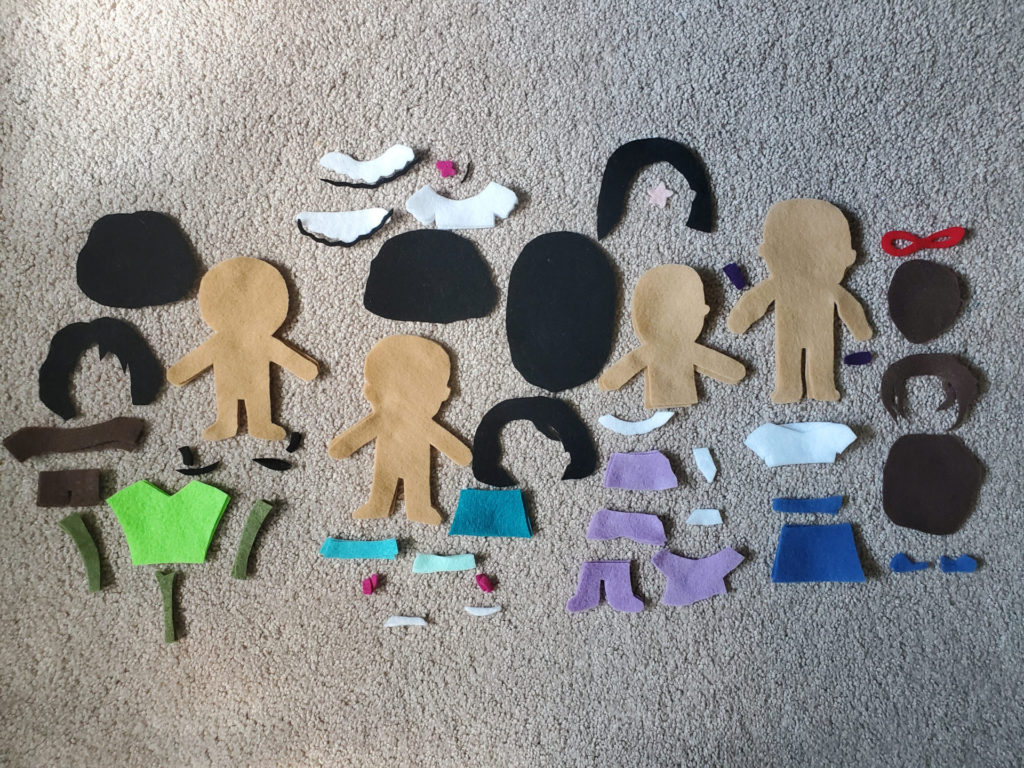
Using patterns as guides, cut out the pieces from felt. If you are having difficulty with choosing colours, just get as close as you can. I like to google the characters for clarification, or you can go to the Disney wiki page and it will give you more details about the characters and their appearances.
Step Three
Sew the bodies and Isabela’s pant legs. You do not need to sew around the arms, unless you like intricate sewing. They are too thin to be stuffed anyway and I just glue them. You can also make it easier by not sewing around the ears or feet and gluing those together instead.
Step Four
Stuff the body and the pant legs. Leave some room in the pants so it will be easier to attach the top to the bottoms.
Step Five
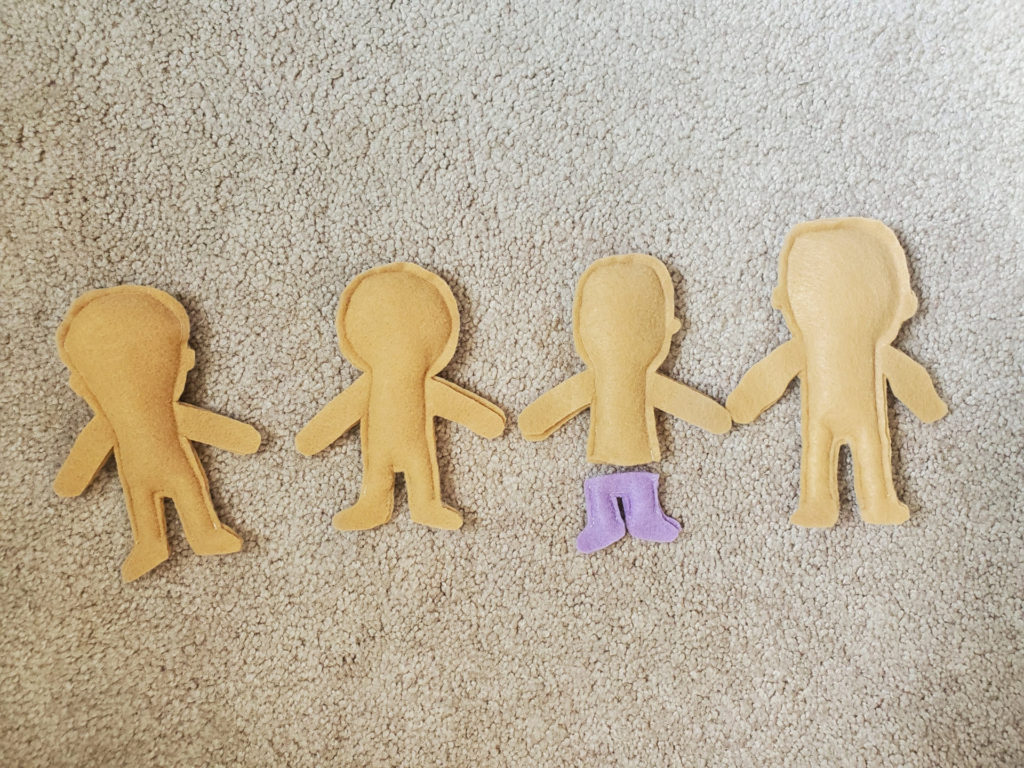
Using a glue gun, glue the arms together, the ears, the feet, and attach the bodies to the pants.
Step Six
Glue on the details. If you are unsure of placement, first lay out the pieces as seen in the image or the video to make sure they are where they need to be. This is probably the most useful step to watch on the video!
Step Seven
For the detailing, you have a few options. Personally, I use acrylic paints. However, I suggest you go with your strength, which could include embroidery, fabric paints, or maybe even markers. I apply the paint with a stylus, but you can use a small brush, or even a toothpick for the fine details. If you aren’t feeling confident in the placement of the facial features, you can lightly draw them on first.
The end!
There you have your instructions for these cute little dolls. Play with them, put them on display, give them as gifts…whatever you’re feeling.
If you have any questions with any of the steps, hopefully the video will help to answer those. Otherwise, feel free to leave your questions in the comments and I will do what I can to help!
As with all of my dolls, feel free to make modifications as you see fit. I’m not a professional doll maker, so if there are shortcuts or hacks that you can do, go for it!
For more doll tutorials, check out my Harry Potter dolls or my Avatar dolls. I will be adding more in the future, so keep checking back!
One thought on “Make Your Own Encanto Dolls: Bruno and His Nieces”