
My son is a big fan of Rubik’s Cubes and other logic puzzles. For his birthday party this year he was having a hard time deciding what theme he wanted to go with. I suggested that we make him the theme and do everything that he likes. This led me to think of a Rubik’s Cube piñata. And it couldn’t just be a plain old boring piñata; it had to be one that could move. It actually wasn’t all that hard to make, compared to other piñatas I have done in the past.
How to Make a Rubik’s Cube Piñata
Step One: Build the Frames
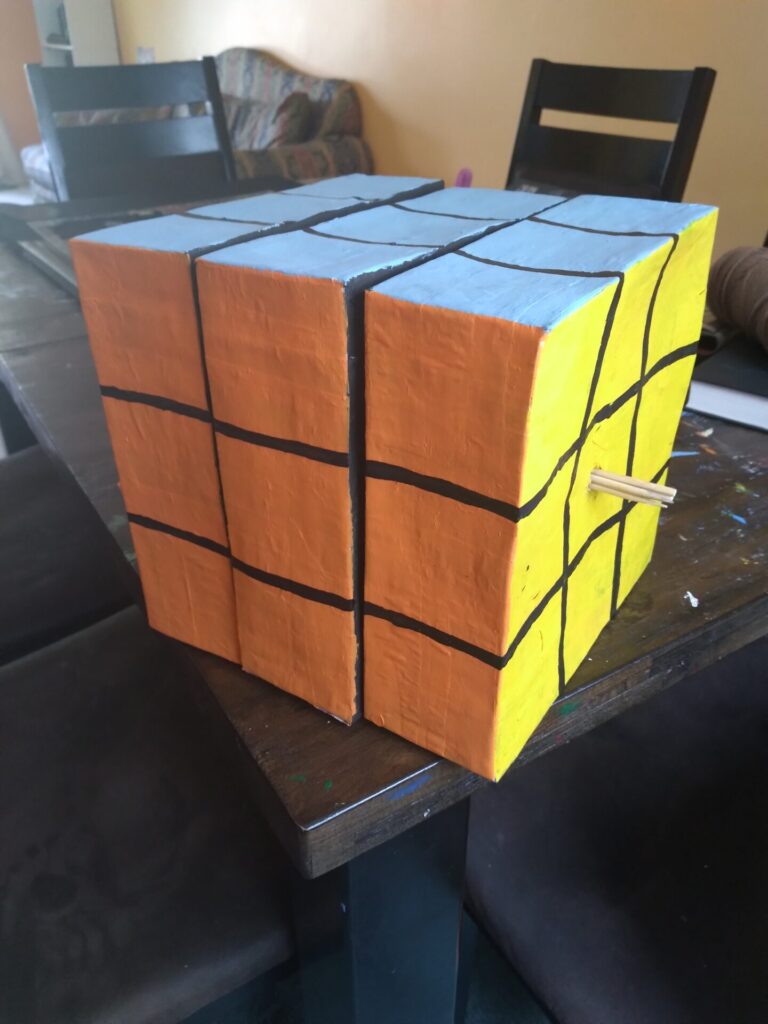
The key to this piñata is to build it in three parts. Building 3 separate sections makes it possible to move. It is important to poke holes through the centres of the sections so that a dowel rod or skewer can be put through them in order to create the axel.


Step Two: Papier Mâché
The most important part of making a piñata is making it nice and sturdy. I put 2 layers of papier mâché on these. I find when there is a cardboard base rather than a balloon, you don’t need as many layers of the papier mâché. The shape of these frames was so nice too. I could easily keep track of where I had already done the papier mâché, which is usually a challenge with a sphere or other more complicated shape. Remember to keep an opening for the candy. I like to let the piñata dry, then I add in the candy. Then I papier mâché over the openings and let that dry.
It is also super important to stuff the frames with plastic bags or newspapers, or any other material that will keep the sides from caving in due to the weight of the glue and paper.


Unsure of how to make papier mache? Check out my post here for instructions.
Step Three: Paint the Sides
I let my son decide the colours for each of the sides. You can go with the standard colours, or be more adventurous. Just don’t forget to emphasize the lines where the squares separate, especially on the sides that don’t actually move.

Step Four: Assemble
Unfortunately, I didn’t have a dowel rod on hand, but that definitely would have been my first choice as the anchor. Since I had to use what I had on hand, I went with BBQ skewers. I just bundled them together to make it sturdier. After inserting them through the holes, you can add some papier mâché on the ends to keep them more secure. The ends of the rod can then be used to tie yarn or rope or whatever you want to use to hang the piñata. The rod will allow the individual boxes to rotate, which looks really cool when the kids are hitting them with a stick!


Step Five: Enjoy Your Rubik’s Cube Piñata!

